Posted on Leave a comment

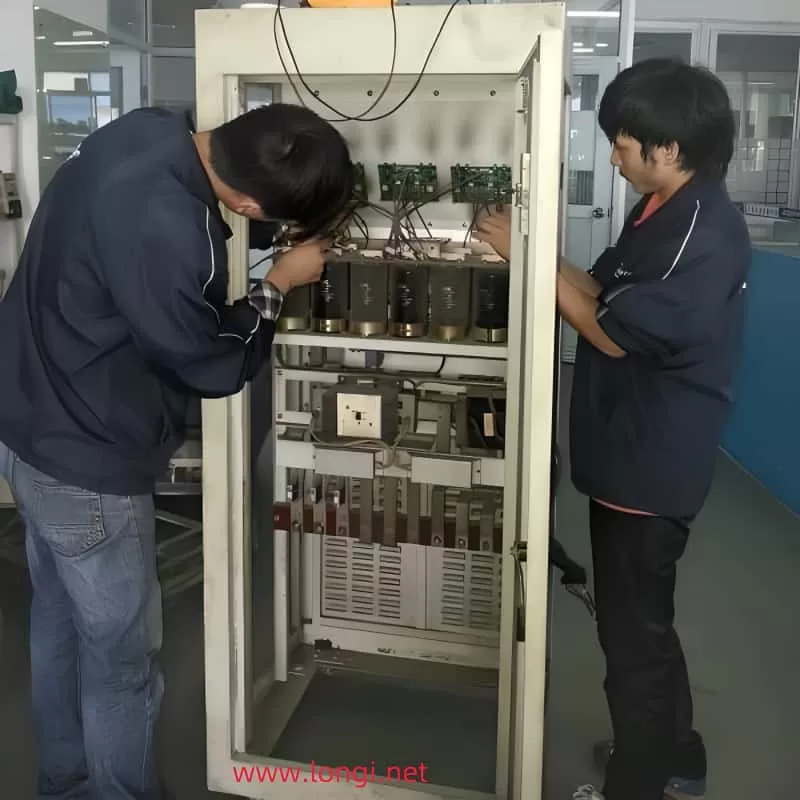
Repair process of driving circuit for 22kW Delta frequency Inverter

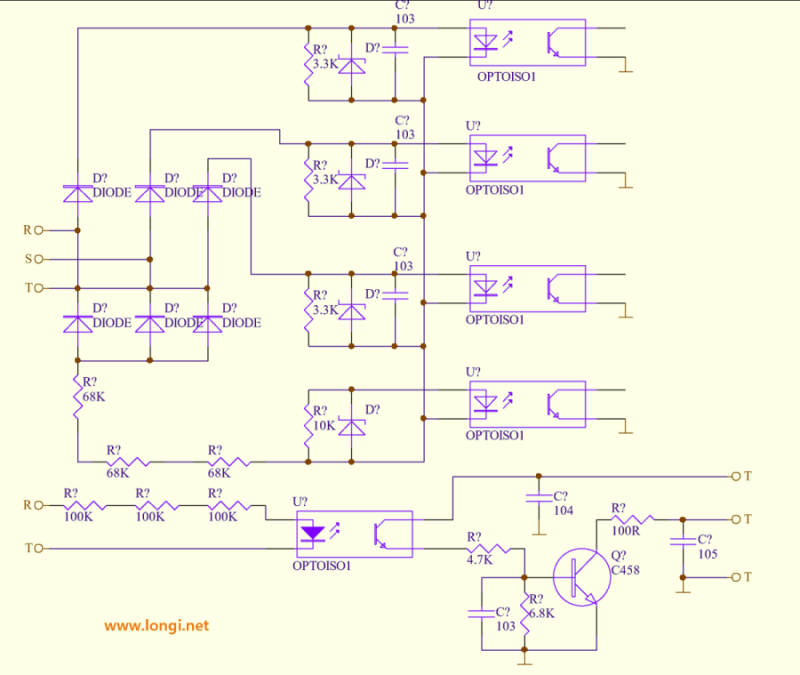
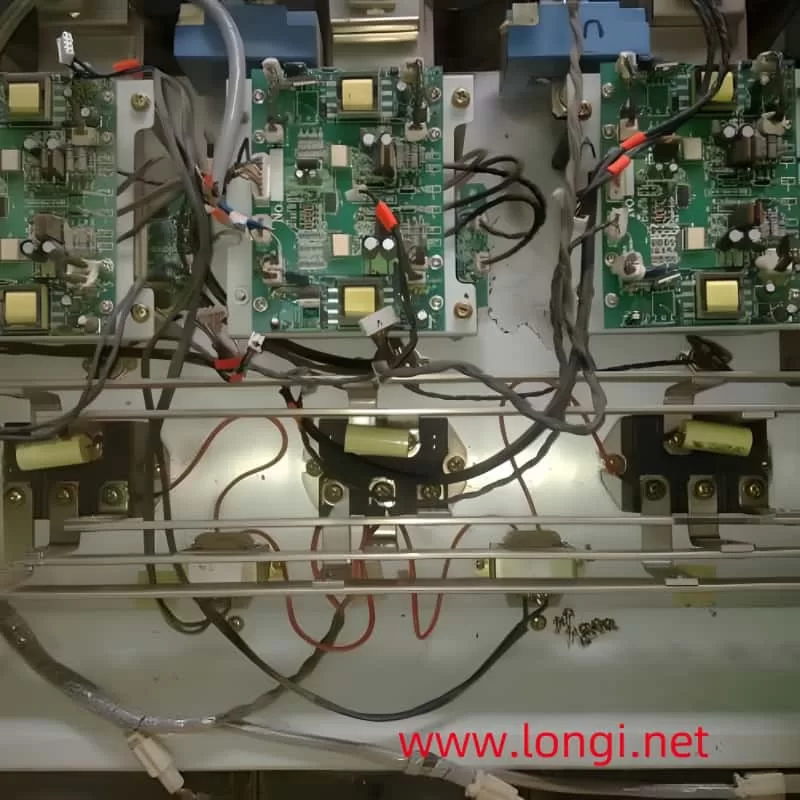
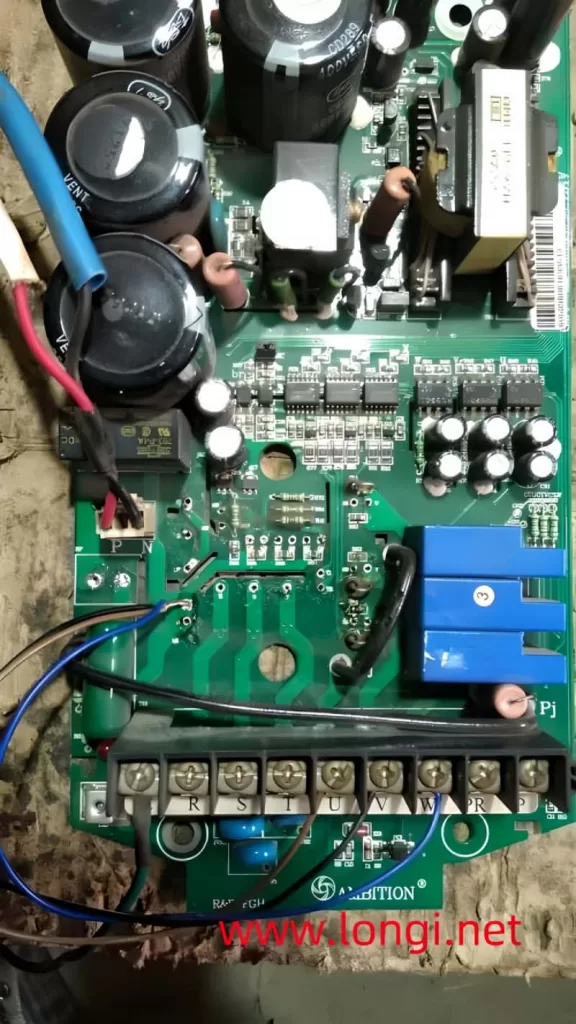
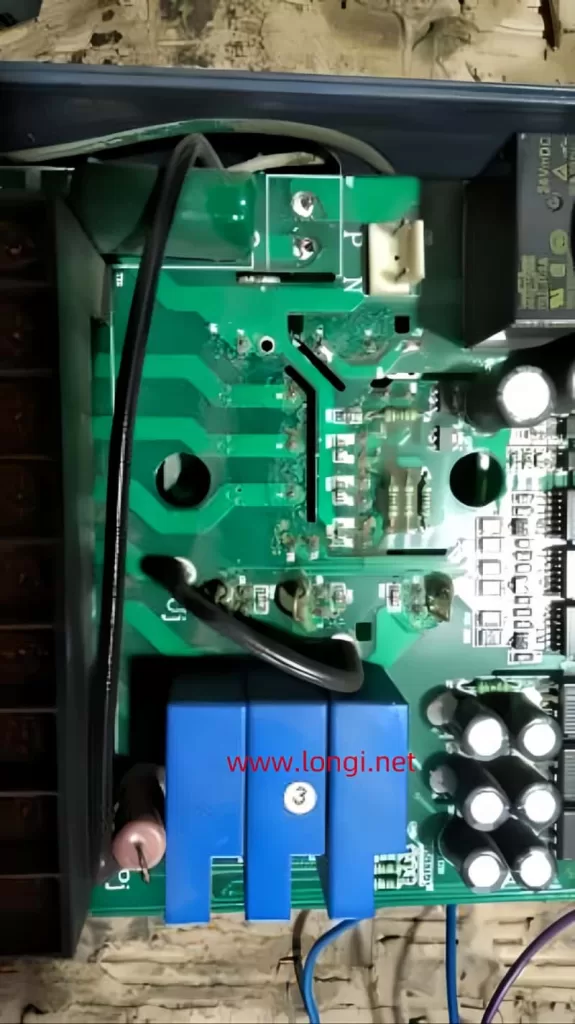
After checking the drive circuit of the 22kW Delta VFD Drive and replacing it with a new module, the OC will jump upon startup. The module is newly replaced, and all six drive pulses are working properly. I don’t think it should be. Still checking the measurement, the six negative pressures driving the IC during shutdown are all normal, and the six excitation voltages are also normal after startup. It is necessary to first determine whether the fault is caused by the driver IC or the module.

It is necessary to first test the load carrying capacity of the six drive ICs, that is, to measure the trigger current value of their output. Connect a 15 ohm resistor in series to the output terminal, and then connect a 15 ohm resistor in series to the probe to limit the circuit current to around 0.5A. After the start signal is activated, its current output capacity is measured, and it can still provide a dynamic current of about 150mA even when the original trigger circuit is connected normally. The driving circuit of the V-phase lower arm IGBT tube only outputs about 40mA of current, which obviously cannot meet the excitation requirements of the IGBT tube. The root cause of the OC fault lies in this!
There seems to be a misconception about the driving method of IGBT tubes, especially high-power IGBT tubes: IGBT tubes are voltage signal excitation devices, not current type excitation devices. The driving signal only needs to meet the voltage amplitude, without requiring too much current driving capability! I have previously analyzed that even IGBT tubes are essentially current driven devices!
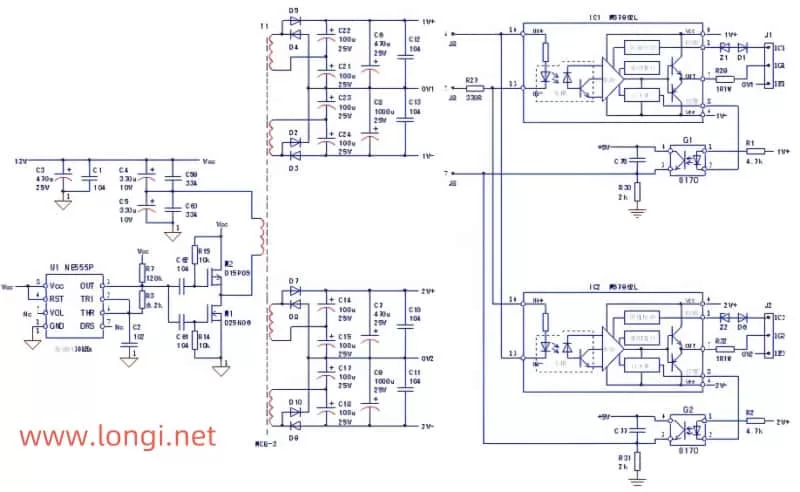
The output signals of the driving ICs (PC929 and PC923) of the machine are amplified by a complementary voltage follower and then supplied to the triggering terminals of the module. The push-pull amplifier was originally a pair of field-effect transistors, but due to the lack of the original type of transistor on hand, it has now been replaced with transistor pairs D1899 and B1261. After modification testing, it should be able to meet the excitation requirements. Check the V-phase lower arm circuit. The resistance from pin 11 (pulse output pin) of PC929 to the subsequent power amplifier circuit was originally 100 ohms, but now it has changed to over 100k, causing D1899 to be unable to fully conduct and the output driving current to be too small. After replacing the resistor, the output current is normal. After replacing the power transistor, the base resistance was not measured, resulting in this phenomenon.
By the way, I measured the negative current supply capacity of the driving circuit when cutting off negative pressure output. The probe is still connected in series with a 15 ohm resistor, and each circuit is around 30mA.
This leads to the conclusion that measuring the output voltage of the driving IC is not as direct and effective as measuring its output current. And it can expose the root cause of the malfunction. When the internal resistance of the circuit output increases due to certain reasons, measuring the driving voltage is often normal, which masks the truth of insufficient driving current.

Posted on Leave a comment

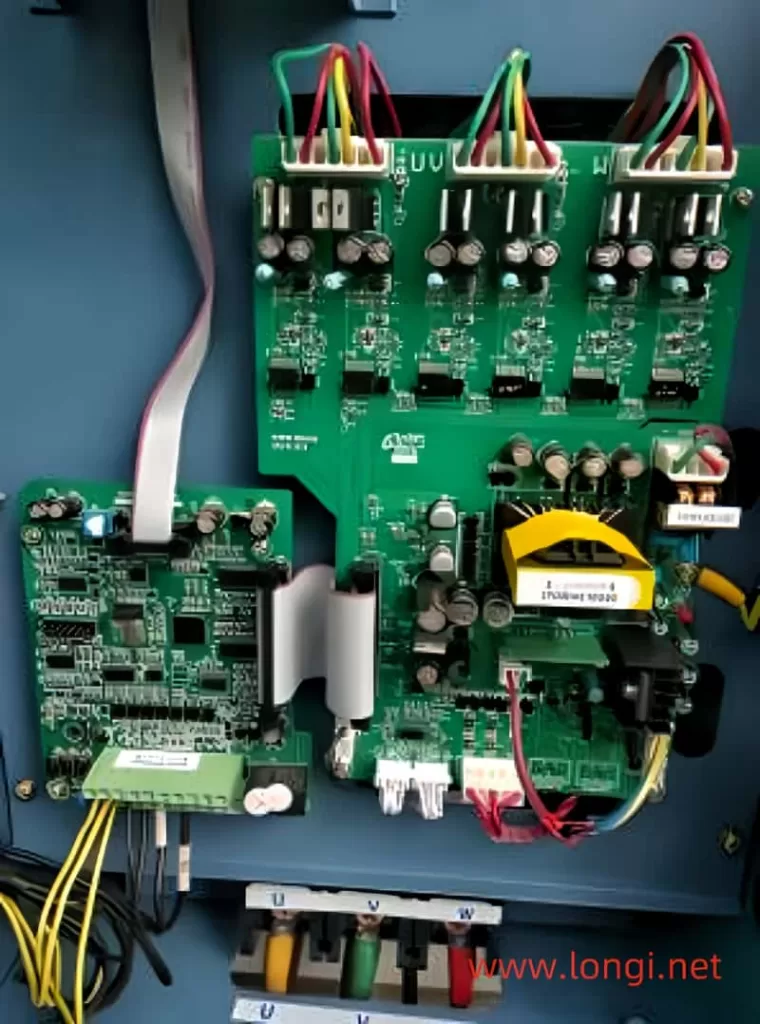
Repairing a 22kW HC1 Drive Module Malfunction: A Detailed Guide

When dealing with the repair of a 22kW HC1 drive, it’s crucial to approach the process methodically, especially when encountering complex issues such as a blown fuse in the inverter module power supply series connection. This particular case study illustrates the step-by-step diagnosis and resolution of such a problem, highlighting the importance of thorough inspection and precise troubleshooting.

Initial Diagnosis and Fuse Replacement

The initial indication of trouble was the blown fuse in the inverter module’s power supply series connection. With no other abnormalities detected in the main circuit measurements, it was tempting to assume that simply replacing the fuse would resolve the issue. However, upon reinstalling the fuse and powering the inverter to 24V, the system immediately triggered an EOCn error code, indicating an overcurrent during acceleration or a short circuit on the motor side. This clear sign of ongoing malfunction signaled that the problem was more complex than just a blown fuse.

In-Depth Investigation of the Driver Circuit

With the fuse replacement failing to solve the issue, the next step was to dismantle and recheck the driver circuit board. A meticulous examination revealed that one of the driver circuits was not outputting a positive excitation pulse. Further investigation led to the discovery of a faulty power amplifier tube (lower tube) in the driver circuit. This component had broken down, causing the voltage terminal of the module trigger terminal to be continuously embedded in negative pressure.

The faulty amplifier tube was replaced, and the pulse circuit returned to normal operation. This repair seemed promising, so the machine was reassembled, connected to a 24V power supply, and powered on. However, the system immediately tripped with an EfbS error, indicating that the fuse had blown again.

Further Diagnostic Measures

To pinpoint the exact cause of the repeated fuse blowing, the 24V power supply was removed, and the original fuse terminals were replaced with light bulbs in series. This setup allowed for visual confirmation of power transmission, with the bulbs emitting strong light upon power-up. During a power outage, the trigger terminal was removed, and individual measurements of the module showed no abnormalities.

With the fuse replaced once more and the inverter circuit reconnected to the 24V power supply, the frequency converter was started. As the frequency rose to around 5Hz, the ECOn error would still trip, indicating persistent issues. At this point, it was unclear whether the problem lay in the module or the driver circuit.

Comprehensive Module and Driver Circuit Testing

To further narrow down the problem, the positive and negative voltage and current of the drive output were checked, and both were found to be normal. This finding suggested a possible module malfunction. To confirm this, all three modules were removed and placed on a workbench for power testing alongside the driver board.

Upon powering on the setup, it was observed that the negative pressure on one arm was unusually low, approximately 2V. Disconnecting the trigger terminal restored the negative pressure to its normal value. However, when the module trigger terminal was reinserted, the negative pressure decreased again. This confirmed that the module was indeed damaged.

Final Resolution

With the damaged module identified, it was replaced with a new one. After reinstalling the repaired components, the system was powered on and tested. This time, there were no error codes, and the drive operated smoothly without any issues. The fault had been successfully repaired, and the 22kW HC1 drive was restored to full functionality.

Conclusion

This case study underscores the importance of a systematic and thorough approach to troubleshooting and repairing complex electronic systems like the 22kW HC1 drive. By carefully examining each component and testing various scenarios, the root cause of the malfunction was identified and resolved. It also highlights the value of using diagnostic tools and techniques, such as replacing fuse terminals with light bulbs, to visually confirm power transmission and isolate faulty components. In the end, a combination of meticulous inspection, precise testing, and replacing damaged components led to a successful repair.

Posted on Leave a comment

Repair of EDS1000 ENC VFDV Misleading Current Fault

A ENC EDS1000 11kW Inverter will trip to constant speed overcurrent when accelerating to above 40Hz during operation. But in reality, the operating current is much lower than the rated current, and after switching to other frequency converters, the motor runs normally. Check that the six inverter pulse outputs of the driving circuit are all normal. It is determined that the current transformer circuit detection is abnormal. Check the current detection circuit. The output signal of the current transformer is divided by a 3-ohm resistor and a 30 ohm resistor before being supplied to the motherboard. Suspecting that the current transformer is a non-standard product, an external voltage divider network was connected for adjustment. The partial voltage value may not be accurate enough, causing the current sampling value to be too large and mistakenly skipping the current fault. Or there may be drift in the output value of the internal circuit of the current transformer, which can also cause a false skip current fault.

The simplest method is to adjust the external voltage divider network of the current transformer. Reduce the voltage divider resistance value below it to meet the requirements of the subsequent circuit input voltage range. If conditions permit, the panel current display value can be monitored during operation, and the voltage divider resistance value can be adjusted to match the operating current value with the displayed current value. Often in the maintenance department, it is not possible to connect the frequency converter to the rated load for operation. Therefore, first replace the lower resistor with a 100 Ω potentiometer, and then adjust it to the appropriate position during on-site installation and operation.

Posted on Leave a comment

Hitachi VFD drive L300P75kW , after repair, installation still jumps “fault”,How to solve ?

A Hitachi L300P75kW Inverter was installed and tested on site after repairing the module fault. When powered on and started, E16.4 or E16.2 jumps. The cause of the fault is a momentary open circuit in the power supply. Stop the machine and measure the three-phase 380V power input. All three phases have 380V and are quite balanced. During operation, when measuring the three-phase output circuit, there is an unstable voltage value in one phase, with fluctuations ranging from 280V to around 350V. The voltage detection circuit of this machine detects the input voltage of T and S phases in the input power supply. When the power grid pollution flash exceeds 15ms, it will protect and shut down. It was determined that the air switch supplying power to the frequency converter had poor contact with one phase, causing the frequency converter to trip E16.4 or E16.2 faults. Upon disassembly and inspection, it was confirmed that a set of contacts had been severely burned out.
Repair after replacing the power switch.

This fault is in a stationary state or a low current state, and due to the virtual connection of the air switch, the abnormal input voltage cannot be detected at all. Only visible when turned on. But due to the abnormal detection of the frequency Inverter, it immediately shuts down for protection. Sometimes, if there is no time to detect, the frequency converter has already stopped. So it’s not easy to detect. It took some effort.

Posted on Leave a comment

15kW WEICHI VSD fault repair due to lightning strike

Taking over a 15kW WEICHI frequency inverter, it was damaged by lightning strikes. The motherboard and driver board were both struck by lightning, but fortunately, the module and CPU were not damaged.

Inspection:

  1. Control terminal+10V voltage to 0, no output. This voltage is obtained by stabilizing the+15V of the switching power supply through the LM317 (eight pin SMT IC) circuit. At the moment, there is no LM317 SMT IC at hand, so a 100 Ω resistor and a 10V voltage regulator are used as substitutes for repair;
  2. The LF347 chip IC (four operational amplifier integrated circuit) in the voltage detection circuit is damaged, and the LM324 chip is directly used as a substitute. The functions of each pin are consistent;
  3. The SMT transistor for controlling the charging relay is damaged and replaced with a plastic sealed direct insertion transistor D887.
    All lightning faults have been repaired. The test run is normal.
Posted on Leave a comment

Troubleshooting and Repairing the Shanghai Rihong CHRH-415AEE 1.5kW Variable Speed Drive (VSD)

Repairing electronic equipment, especially complex devices like variable speed drives (VSDs), often requires a meticulous approach to diagnosing and solving issues. A recent repair case involving the Shanghai Rihong CHRH-415AEE 1.5kW VSD highlights the importance of thorough inspection and the unexpected twists that can arise during the troubleshooting process.

The user of the CHRH-415AEE VSD reported experiencing unstable output and motor jumping, indicating a potential issue within the drive’s operation. Initially, the output module and other critical components were examined and found to be functioning normally. This preliminary check ruled out any straightforward hardware failures, prompting a deeper investigation.

To delve into the problem, the inverter module was disconnected from its power supply. This step was crucial to isolate and assess the quality of the inverter pulse conveying circuit, including the driving circuit. The VSD was then reassembled as a complete unit on the maintenance bench, without the machine cover, and powered on for inspection.

Upon powering up, the operation panel displayed normal readings, suggesting that the basic functionality of the control interface was intact. However, when attempting to start the operation, an “E OH” error code appeared, indicating an overheating issue. This was puzzling, as there were no apparent signs of overheating, and the thermal signal output terminals of the short-circuit modules T1 and T2 were not active.

To further investigate, the thermal signal terminal was disconnected, and the original wiring terminal was connected to a potentiometer for voltage regulation. This test, however, yielded no significant changes, and the overheating error persisted. At this point, it was necessary to consult the internal circuit diagram of the module to understand the signal flow and identify any potential anomalies.

The circuit diagram revealed that the terminal in question was equipped with a thermistor (rated at 10k ohms at zero degrees Celsius). This thermistor was connected to an external +5V resistor to divide the voltage, which was then directly sent to the CPU. Based on room temperature, the expected voltage at this point should have been below 2.5V. Measurements confirmed that the voltage was indeed 2.3V, indicating that the built-in thermal element and circuit were functioning correctly.

Despite these findings, the overheating error continued to plague the VSD. It was at this juncture that a fortuitous discovery was made. During the inspection, it was noticed that a small square shielding iron sheet had been wrapped around the back of the operation panel. When the operation panel was pressed, one corner of this iron sheet made contact with the 41st pin of the CPU. This particular pin happened to be the input pin for the overheat signal.

The contact between the iron sheet and the CPU pin was creating a false overheating signal, essentially tricking the CPU into thinking that the module was overheating. This was a highly unusual and coincidental issue, but it explained the persistent “E OH” error code. To resolve this problem, a piece of cardboard was placed between the operation panel and the motherboard circuit. This simple yet effective solution prevented the iron sheet from making contact with the CPU pin, eliminating the false overheating signal.

With the root cause identified, the focus shifted to repairing the faulty driver circuit. It was determined that the driver IC (integrated circuit) was likely responsible for the issue. The driver IC was replaced with a new one, and the VSD was reassembled and tested. After the repair, the VSD performed flawlessly, with no more overheating errors or unstable output issues.

This case underscores the importance of meticulous inspection and the willingness to explore unconventional possibilities when troubleshooting electronic equipment. The repair process not only required technical knowledge but also a dose of creativity and persistence to solve the puzzling issue. In the end, the successful repair of the Shanghai Rihong CHRH-415AEE 1.5kW VSD was a testament to the power of thorough diagnostics and innovative problem-solving.

Posted on Leave a comment

Exploring the Major Causes of Damage to Inverter Output Modules

Exploring the Major Causes of Damage to Inverter Output Modules

In variable speed drive (VSD) systems, damage to the inverter output module is an issue that cannot be ignored. This article delves into several primary reasons behind this failure, analyzing the underlying logic and mechanisms to provide valuable insights for relevant practitioners.

I. Damage Caused by Abnormal Loads

Despite the considerable sophistication of protective circuits in inverters, their protective capabilities may still be limited when faced with abnormal loads. Inverter manufacturers have invested significant effort in protecting inverter modules, employing various measures such as output current detection and IGBT voltage drop detection to achieve the fastest possible overload protection. However, when motors themselves have underlying issues like insulation aging or winding defects, even comprehensive protective functions of the inverter may not fully prevent module damage.

Especially in cases where motors have been operating for many years and their insulation has significantly degraded, connecting them to inverters may result in voltage breakdowns between windings due to high-frequency carrier voltages, leading to short-circuit currents that can instantly subject the inverter module to enormous shocks, causing damage. This type of module damage, triggered by internal motor faults, is difficult for inverter protective circuits to effectively prevent.

II. Damage Caused by Inverter Circuit Issues

  1. Drive Circuit Failures
    The drive circuit is a crucial component of the inverter module, typically supplied by both positive and negative power sources. When the +15V voltage is insufficient or lost, the IGBT cannot be turned on. If the drive circuit’s fault detection function is working properly, the inverter will report an OC signal and shut down for protection. However, if the -5V off-voltage is insufficient or lost, it may cause the IGBT to mistakenly turn on, creating a short circuit that can deal a fatal blow to the module.
  2. Poor Pulse Transmission Path
    The PWM inversion pulses output by the CPU pass through a buffer before being sent to the drive IC and then to the trigger terminals of the inverter module. Any interruption in this transmission path can cause the inverter to report an OC fault or operate in an unbalanced phase. Unbalanced phase operation generates DC components and surge currents, which can impact the module and increase the risk of damage.
  3. Failure of Detection Circuits
    Current detection circuits and module temperature detection circuits are important barriers for protecting the inverter module. If these circuits fail or malfunction, they will be unable to effectively monitor overcurrent and overheating conditions in the module, thereby losing their protective function.
  4. Decrease in Energy Storage Capacitor Capacity
    A decrease in the capacity of the energy storage capacitor in the main DC circuit increases the pulsating components of the DC circuit voltage. During loaded startup, this can cause the inverter module to withstand excessive voltage shocks, leading to damage.

III. Damage Caused by Product Quality Issues

In the market, some domestically produced inverters are criticized for their poor quality and shoddy workmanship. These inverters have obvious deficiencies in the design of protective circuits and the selection of inverter module capacities, making the modules prone to damage. For example, using small-capacity modules, old or defective modules, and ineffective protective circuits significantly increase the risk of module damage.

Conclusion

In summary, the damage to inverter output modules is a result of multiple factors working together. To reduce the risk of module damage, we should approach the issue from multiple angles: strengthen motor maintenance and inspection to ensure motors are in good condition; optimize inverter design to improve the reliability and response speed of protective circuits; and, when choosing inverters, consumers should prioritize product quality and after-sales service to avoid purchasing inferior products. Only in this way can we more effectively protect the safe operation of inverter output modules and extend the lifespan of inverters.

Posted on Leave a comment

Siemens MM430 VSD 7.5kW power supply hiccup fault

Repair an imported Siemens 7.5kW frequency converter due to power supply hiccup fault, with no display on the operation panel. Due to its special installation structure, the machine is surrounded by three circuit boards and a heat dissipation plate in a square shape, with an embedded shell. When repairing, it is necessary to disconnect the circuit board and lay the entire circuit flat on the workbench, such as unfolding a roll of ancient bamboo slips, in order to facilitate maintenance. Moreover, the circuit board is a four layer board, making circuit maintenance difficult.

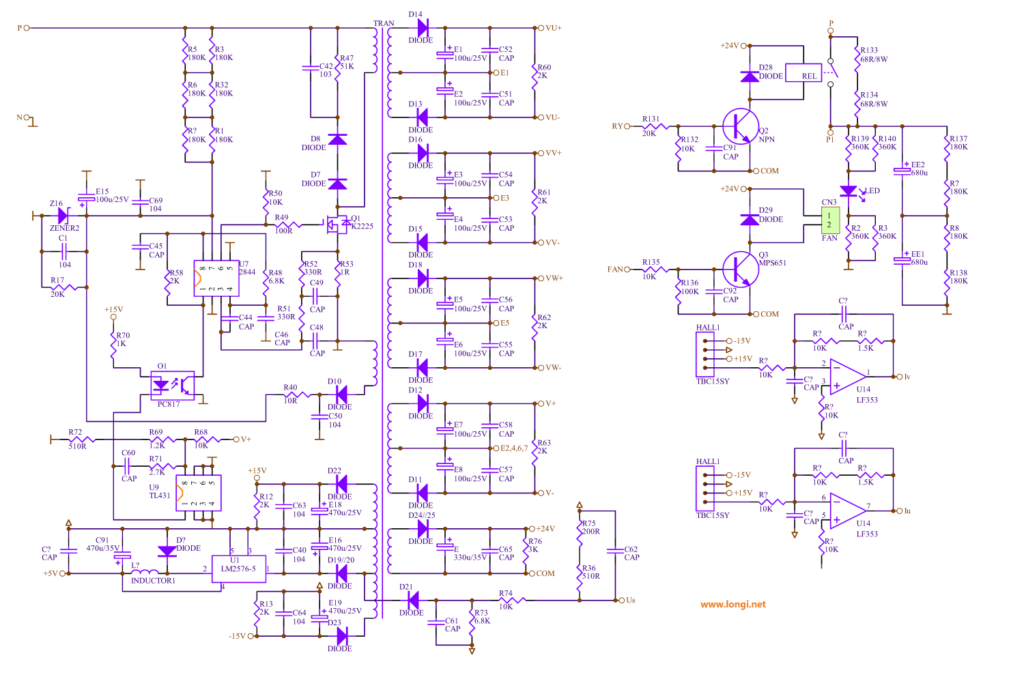
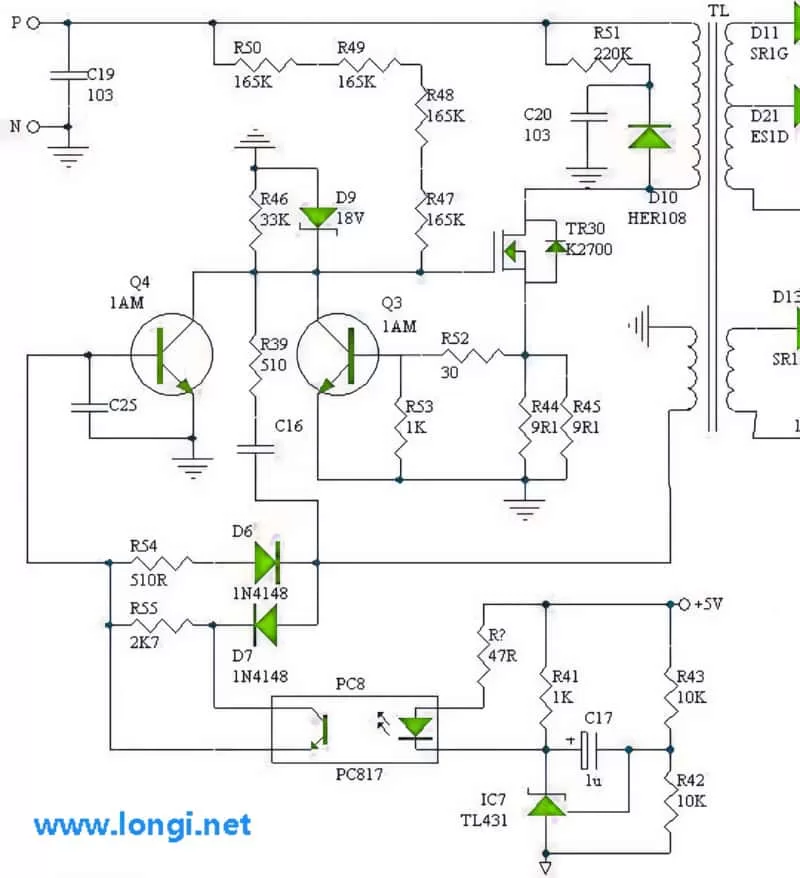
Starting from the switch power supply circuit, first use the elimination method to cut off the load circuit one by one. If it still cannot vibrate well, it indicates that hiccups are not caused by excessive load. There are no abnormalities in the oscillation and voltage stabilization circuits. Finally, it was found that two 200V voltage stabilizing tubes in the cut-off shunt circuit of the switch tube were damaged due to breakdown. We purchased 110V voltage stabilizing tubes from the market and replaced them with four to repair them. A typical shunt (also known as anti peak voltage absorption) circuit uses a diode connected in series with a resistance capacitance parallel circuit, and then connected in parallel with the primary winding of a switching transformer. The diode connection method is similar to the freewheeling diode connection method of a typical coil circuit. Its function is to quickly release the electrical energy of the primary winding circuit during the period when the switching transistor is approaching cutoff, so that the switching transistor can cut off more quickly. But the circuit consists of two 200V voltage regulators connected in series from the P+end, followed by two thermistors with resistance values of 360k each, connected in series to the drain of the switching tube. The circuit is also connected in parallel to the primary winding. When the switch tube tends to cut off, the sharp decrease in current in the primary winding causes a sharp increase in the back electromotive force of the winding. When it is superimposed with the power supply voltage and exceeds the P+voltage by 400V, this protective circuit breaks down and conducts, releasing this energy back to the power supply. When the back electromotive force energy is small, the current flowing through the two thermistors is small, their temperature rise is also small, their resistance value is large, and the release of energy is also slow. When the back electromotive force energy is large, as the discharge current increases, the resistance temperature rises, the resistance value decreases, and the energy discharge is accelerated. Think about it, this circuit is connected in series with a thermistor, it’s really interesting. Adding a thermistor and a peak voltage absorption circuit with voltage stabilizing diodes to the primary winding of the switch transformer may only be done by Siemens frequency converters. I have also encountered this type of circuit form for the first time.

Posted on 2 Comments

Troubleshooting a Convo Frequency Converter: A Case Study

When dealing with complex electronic devices like frequency converters, troubleshooting can often be a challenging task. This article presents a detailed case study of a 5.5kW Convo frequency converter that was sent for repair due to issues with its operation. Despite having output, the converter was unable to operate with a load, the motor couldn’t rotate, and the operating frequency couldn’t be adjusted.

Initial Examination and Tests

Upon receiving the unit, the main circuit, rectifier, and inverter circuits were thoroughly checked and found to be normal. With no load connected, the three-phase output voltage was also measured and deemed normal. However, when a 1.1kW no-load motor was connected and the frequency converter was started, the frequency couldn’t rise above one or two hertz. The motor would pause and produce a creaking sound, with no overload or OC fault reported.

Investigating the Drive Circuit

Suspecting an issue with the drive circuit, the 550V DC power supply of the inverter module was disconnected, and a 24V DC low-voltage power supply was used to check the drive circuit. All capacitors and components in the drive circuit and drive power supply circuit were normal. The positive and negative pulse currents output by the three-arm drive circuit on the inverter output had reached a sufficient amplitude, indicating that there should be no issue driving the IGBT module.

However, when measuring the pulse currents, a module fault was reported. Upon analysis, it was discovered that the multimeter’s DC current range had been directly short-circuited to measure the triggering terminal, lowering the positive excitation voltage output by the drive circuit. This voltage drop prevented the IGBT tube from being triggered normally and reliably, leading to the OC module fault. When the measurement method was adjusted by connecting the probe in series with a resistance of over ten ohms, the OC fault was no longer reported.

Further Investigation

With the drive circuit functioning normally, the signal output circuit of the current transformer was also checked and found to be normal. During operation, no fault signal was reported, leaving the technician puzzled.

Considering the possibility that the CPU might be detecting abnormal current during startup and taking measures to slow down, the technician explored various potential causes:

  • Abnormal Current Detection: Could the CPU be detecting a sharp increase in abnormal current values and performing immediate frequency reduction processing?
  • Driving Circuit Issues: Was the current limiting action due to abnormal driving or poor module performance?

Attempts to short-circuit the shunt resistors of the U, V, and W output circuits to make the CPU exit the frequency reduction and current limiting action were ineffective. Restoring the parameters to their factory values also had no impact.

Observing the Frequency Converter’s Behavior

Upon starting the frequency converter and observing its behavior, it was noticed that after the speed rose to 3Hz, it would drop to 0Hz and repeat this process. The motor would stop running. When the acceleration time was significantly increased, the speed steadily increased to 3Hz and then decreased to 0Hz, indicating that there were no abnormalities in the drive and other circuits. This operating phenomenon seemed to be based on a signal emitted by the CPU, possibly as a current limiting action based on the current signal.

Focusing on Voltage

With the drive and current detection circuits functioning normally, the technician shifted their focus to voltage. The anomalies caused by voltage could be divided into two aspects:

  1. Abnormal DC Voltage Detection Circuit: This could be due to the drift of the reference voltage, variation of sampling resistance, or other issues. This signal might cause the CPU to mistakenly assume that the voltage is too low and take measures to reduce the output frequency.
  2. Abnormality of the Main DC Circuit: This could result in low voltage due to issues like loss of capacity of the energy storage capacitor or failure to close the charging short-circuit contactor.

Discovery of the Issue

Upon reinstalling and powering on the machine for a motor test, it was noticed that there was no sound of the charging contactor closing. Checking the contactor coil revealed that it was supposed to receive AC 380V from the R and S power supply incoming terminals. However, loose coil lead terminals had caused poor contact, preventing the contactor from engaging. The large current during startup created a significant voltage drop on the charging resistor, which was detected by the voltage detection circuit, prompting the CPU to issue a frequency reduction command.

Conclusion

The reason for the detour in troubleshooting was that the machine only performed frequency reduction treatment when the voltage dropped and did not report an undervoltage fault. In this case, other models might have reported an undervoltage fault. Due to the no-load condition, the voltage quickly rose during frequency reduction processing, allowing the frequency to continue to rise. This repeated process caused the frequency converter to increase speed, decrease to zero speed, pause, and then repeat the cycle without shutting down or reporting any fault signals.

This case study highlights the importance of thorough investigation and detailed observation in troubleshooting complex electronic devices. Relying solely on surface phenomena and past experience can lead to misdiagnosis and unnecessary repairs. By delving deeper into the issue and considering all potential causes, the technician was able to identify and fix the problem, ensuring the frequency converter’s proper operation.

Posted on Leave a comment

Solving Two Unusual Faults in AMB VSD: A Detailed Guide

When dealing with variable speed drives (VSDs), encountering unusual faults can be both perplexing and time-consuming. This article will delve into two unique faults encountered in an Anbang Xin AMB-G9/P9 22kW frequency converter and provide step-by-step solutions to resolve them.

Fault A: Mysterious “Fault Characters”

A user sent in a domestically produced frequency converter for repair, specifically an Anbang Xin AMB-G9/P9 22kW model. Upon initial inspection, the damaged module was removed, and the drive circuit was tested for normalcy. Upon powering on, the operation panel displayed an OC fault code. Once the short-circuit fault signal was addressed, the OC signal stabilized. However, when attempting to run the converter by pressing the RUN button, the charging relay momentarily disconnected, causing the panel indicator light to go out and the display screen to flash a series of unrecognizable “fault characters” not listed in the fault code table.

Diagnosis and Solution:
  1. Identify the Anomaly:
    • The output terminals of the three-phase output current detection signal were all at 0V, which is normal.
    • Occasionally, upon cycling the power, it was discovered that the “fault characters” were actually startup characters.
  2. Root Cause Analysis:
    • The malfunction indicated a possible short-circuit load on the switching power supply’s load side, particularly in the driving circuit.
    • When the startup signal was activated, the power supply voltage dropped significantly, causing the switching power supply to stop oscillating.
    • This voltage drop also released the charging relay due to insufficient suction voltage, prompting the CPU to believe it was being re-powered on and displaying startup characters.
  3. Circuit Inspection:
    • Examination of the driving circuit revealed that two power amplification tubes, connected in a push-pull configuration behind the driving IC, had sustained damage.
    • One transistor in both the upper and lower arm driving power amplifier circuits of the U-phase was damaged.
    • This damage caused an instantaneous short circuit to the driving power supply when pulse signals arrived, resulting in a momentary shutdown.
  4. Resolution:
    • Conduct a thorough inspection of the driver board before powering on after dismantling the module.
    • Replace the damaged transistors in the driving circuit to ensure proper pulse amplification and module driving.

Fault B: Unlisted Fault Characters Related to the Brake Circuit

After replacing the module, the converter was tested with a 24V DC power supply without connecting the 530V DC voltage of the DC circuit. Upon startup, the Br Tr FeiLuRe character appeared but could be reset with the reset button. However, disconnecting the 24V power supply resulted in the fault persisting and becoming unresettable.

Diagnosis and Solution:
  1. Initial Checks:
    • The fault code was checked, and the manufacturer indicated it was a brake circuit fault, which seemed unusual given that the external brake resistor circuit was not connected.
    • Internal brake components were measured and found to have no short circuits.
  2. Voltage Analysis:
    • Upon disconnecting the 24V power supply, a residual voltage of about 6V was found at the inverter power supply terminal.
    • This voltage entered the fault detection circuit, potentially triggering the Br Tr FeiLuRe fault signal.
  3. Circuit Examination:
    • The negative pressure and pulse positive voltage of the six drive circuits were normal.
    • With the guarantee of cut-off negative pressure, connecting the 530V DC voltage to the DC circuit should not damage the module.
  4. Testing and Resolution:
    • For safety, the original 75A quick release fuse was replaced with a 2A one.
    • Everything operated normally after this change, indicating that a faulty fuse or short-circuited brake control IGBT inside the module could generate the Br Tr FeiLuRe alarm.
    • The fault detection circuit likely reported an abnormal low voltage in the DC circuit to the CPU as a brake circuit fault.
  5. Final Considerations:
    • Defining the fault as a brake circuit issue may be misleading.
    • The occurrence of this fault prevented low-voltage power supply testing of the inverter circuits, increasing maintenance costs and complexity.

Conclusion

Encountering unusual faults in VSDs requires a systematic approach to diagnosis and resolution. By carefully examining circuit components, analyzing voltage anomalies, and conducting thorough testing, these complex issues can be resolved effectively. This case study highlights the importance of detailed inspection and the potential pitfalls of misdiagnosed faults, ultimately leading to successful repairs and improved understanding of VSD operation.