
1. Introduction to the Inverter’s Control Panel Functions
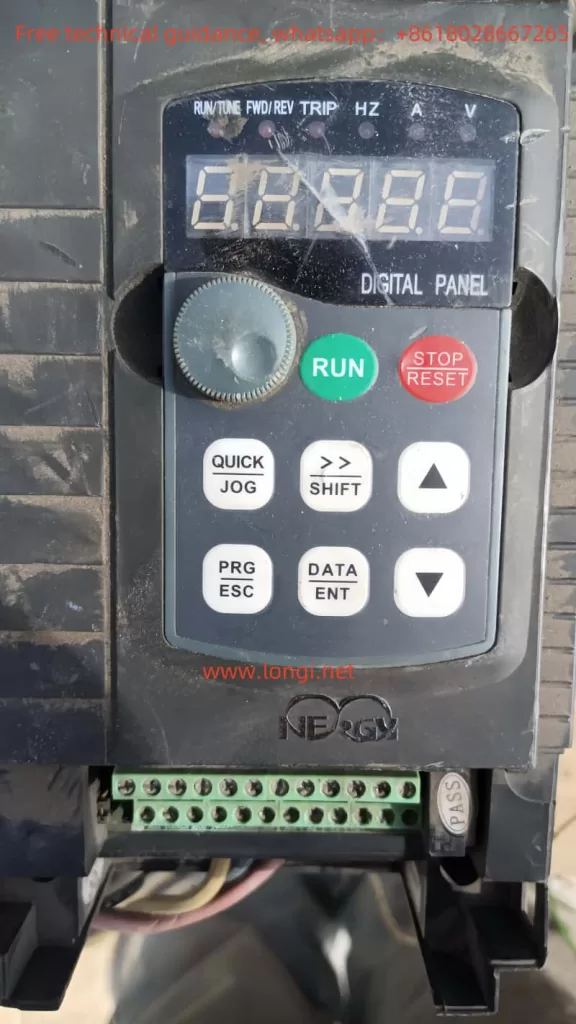
The Anrui E6 series frequency inverter is designed with an intuitive control panel, making it easy for users to set and monitor various parameters. The control panel mainly consists of the display screen, function selection keys, and adjustment knob. Each component serves the following functions:
- Display Screen: Displays the current operating status, frequency, alarm information, and parameter settings.
- Function Keys: These keys allow the user to navigate through different functional menus, view and modify parameters.
- Adjustment Knob: Used to adjust the output frequency, enabling users to control it in real-time.
2. How to Copy Parameters to Another Inverter
The E6 series inverter provides a convenient parameter copy function, allowing users to quickly copy the settings of the current inverter to another one. The steps are as follows:
- Access the control panel and select the Parameter Copy function.
- In the menu, choose the source inverter (current inverter) and target inverter (the inverter where settings need to be copied).
- Confirm the operation and complete the data transfer. The target inverter will replicate all the settings from the source inverter.
This allows users to easily configure multiple inverters with identical settings, ensuring consistency across the system.
3. How to Initialize Parameters
In some cases, users may need to restore the inverter to its default settings. The parameter initialization function can reset all custom settings and restore the inverter to its initial configuration. Here’s how to perform the initialization:
- Access the inverter’s settings menu and select Parameter Initialization.
- Choose either “Restore Factory Settings” or “Clear Fault History.”
- Restore Factory Settings: Resets all parameters to the default values.
- Clear Fault History: Removes any fault records from the inverter’s history.
- Execute the initialization to return the inverter to its default state.
The initialization function allows for a quick reset of the inverter when needed, ensuring that it operates in its original configuration.
4. How to Set and Remove Passwords
The Anrui E6 series frequency inverter offers password protection to prevent unauthorized changes to settings and parameters. Here are the steps for setting and removing passwords:
- Set a Password: Go to the settings menu, select Password Setting, enter the desired password, and confirm. The inverter will then be protected by a password.
- Remove the Password: To remove the password protection, go to the “Password Management” section, select “Clear Password,” and enter the administrator password to confirm deletion.
If a password is set, the inverter will require it when exiting the editing mode. This security feature helps prevent unauthorized modifications to the parameters, improving safety.
5. How to Set Parameter Access Restrictions
To further protect the inverter, the E6 series supports parameter access restrictions. Through this feature, users can limit access to certain parameters, preventing unauthorized users from modifying them. This can be configured in the “Access Permissions” section of the settings menu.
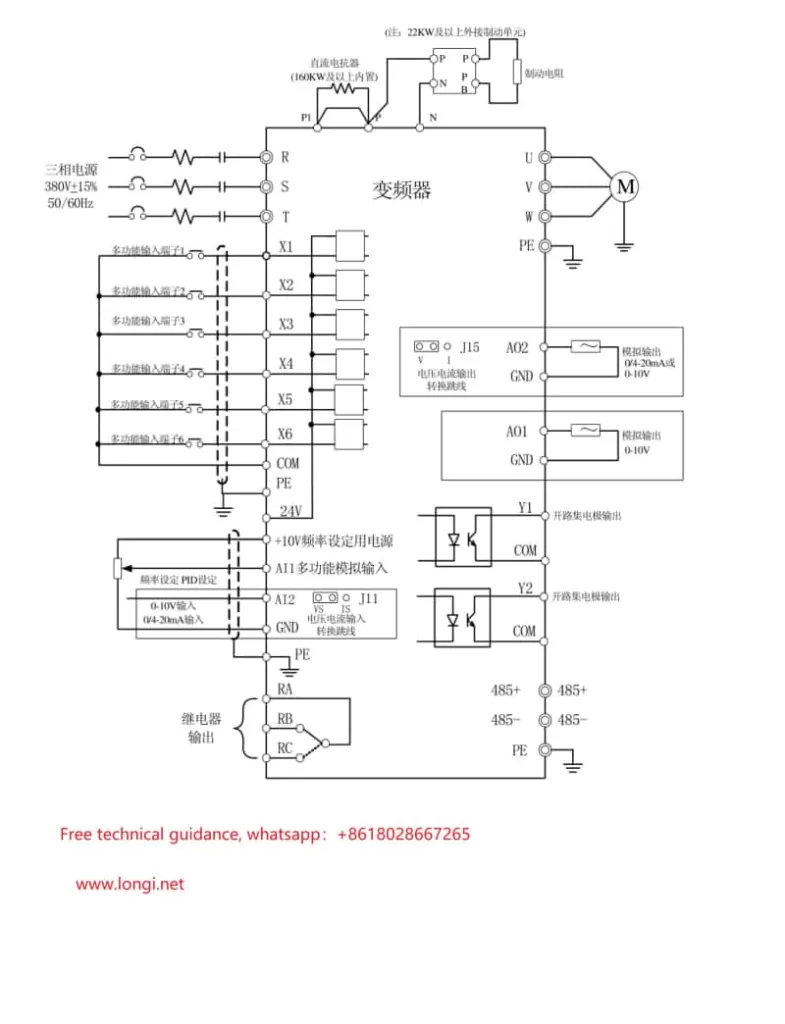
6. External Terminal Control and Potentiometer Speed Control
The Anrui E6 series frequency inverter supports external terminal control for forward/reverse operation and potentiometer speed control. Here’s how to configure these features:
- External Terminal Forward/Reverse Control: Users can connect forward/reverse control signals to the X1 and X2 terminals and set the relevant parameters to control the motor’s rotation direction.
- External Potentiometer Speed Control: Users can connect an external potentiometer to the X3 terminal to control the speed by adjusting the potentiometer’s position. Set the relevant parameters in the inverter to control the frequency range based on the potentiometer’s position.
After these settings, the external terminal signals will directly influence the operation of the inverter.
7. Inverter Fault Codes and How to Handle Them
The E6 series inverter provides various fault codes to help diagnose issues quickly. Some common fault codes include:
- OV1/OV2: Over-voltage fault, typically caused by high input voltage.
- OC1/OC2: Overload protection fault, possibly due to excessive load or high current.
- UV1/UV2: Under-voltage fault, check if the power supply is stable.
Each fault code comes with detailed troubleshooting advice, which can be followed to resolve the issues.
8. Conclusion
By properly utilizing the functions of the Anrui E6 series frequency inverter, users can achieve more efficient and secure control of the equipment. Whether it’s for parameter configuration, fault troubleshooting, or integration with external control systems, the E6 series offers a wide range of options to meet the needs of various applications.
This is the main operational and setup guide for the Anrui E6 series frequency inverter. By following the correct procedures and settings, users can fully utilize the performance of the inverter and ensure long-term stable operation. If any issues arise during use, it is recommended to refer to the manual or contact technical support.