Posted on Leave a comment

Comprehensive Analysis of Particle Size Analyzers: Principles, Brands,Usage, Common Faults, and Repair Methods

Comprehensive Analysis of Particle Size Analyzers: Principles, Usage, Common Faults, and Repair Methods

Overview of Particle Size Analyzers

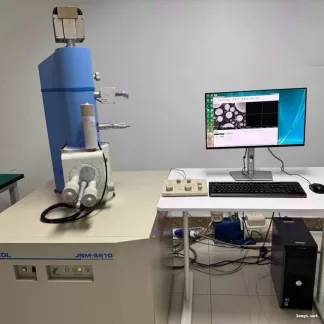
Particle size analyzers are physical instruments used to measure the size and distribution of solid particles. They find extensive applications in materials science, geology, chemical engineering, the food industry, and more. Leveraging various physical principles such as laser scattering, sedimentation, electrical resistance, and microscopic observation, these analyzers precisely measure and analyze particle size characteristics.

Principles

The core principles of particle size analyzers vary based on the measurement method employed. Laser particle size analyzers are a common type. They utilize a laser light source to illuminate the sample, causing particles to scatter light. The intensity and angle of scattered light are closely related to particle size. By measuring the intensity and distribution of scattered light and applying Mie scattering theory or Fraunhofer diffraction theory, the particle size distribution can be calculated.

Laser Scattering Principle: When a laser beam illuminates particles, they scatter light. The intensity and angle of scattered light are inversely proportional to particle diameter. Laser particle size analyzers use a series of photosensitive detectors to measure scattered light intensity at different angles, thereby inferring particle size distribution.

Data Processing: The instrument converts the collected scattered light signals into electrical signals and processes them using built-in software algorithms. Ultimately, statistical parameters such as average particle size and particle size distribution are output.

Usage

  1. Sample Preparation: Choose and preprocess appropriate samples according to testing purposes and requirements, such as screening and drying, to ensure sample uniformity and representativeness.
  2. Instrument Start-up and Calibration: Turn on the instrument power, set instrument parameters (e.g., fluid medium, stirring speed) according to the operation manual, and calibrate using standard samples to ensure measurement accuracy.
  3. Sample Measurement: Place the preprocessed sample into the instrument, initiate the measurement program, and observe the measurement process in real-time until completion.
  4. Data Analysis: After measurement, conduct statistical analysis on the results, calculate parameters such as average particle diameter and particle size distribution, plot particle size distribution curves, and interpret and evaluate the results.

Common Faults and Repair Methods

  1. Laser Source Issues:
    • Fault Phenomenon: Decreased or unstable laser intensity.
    • Repair Method: Check if the laser source needs replacement or cleaning, following the manufacturer’s instructions.
  2. Detector Faults:
    • Fault Phenomenon: Inaccurate measurement results.
    • Repair Method: Inspect the detector for cleanliness, damage, or aging, and perform maintenance or replacement if necessary.
  3. Sample Cell Contamination:
    • Fault Phenomenon: Large measurement errors.
    • Repair Method: Regularly clean the sample cell to ensure proper sample dispersion.
  4. Power Supply Issues:
    • Fault Phenomenon: Instrument failure to start or abnormal display.
    • Repair Method: Check the power cord, socket, and fuse to ensure stable power supply.
  5. Software Issues:
    • Fault Phenomenon: Unstable software operation or failure to upgrade.
    • Repair Method: Regularly check and install software updates to ensure compatibility with the operating system.
  6. Mechanical Component Wear:
    • Fault Phenomenon: Abnormal instrument operation or excessive noise.
    • Repair Method: Inspect and replace worn components, and perform regular lubrication.
  7. Environmental Factor Influence:
    • Fault Phenomenon: Large measurement errors.
    • Repair Method: Monitor the laboratory environment, adjust temperature and humidity, and avoid vibration and electromagnetic interference.
  8. Operational Errors:
    • Fault Phenomenon: Incorrect settings or inaccurate data interpretation.
    • Repair Method: Provide operational training to ensure users understand all software functions.

Brands and Models of Particle Size Analyzers Repaired by Longi Electromechanical

  1. Malvern Panalytical
    • Mastersizer Series: Mastersizer 3000, Mastersizer 2000
    • Zetasizer Series: Zetasizer Ultra, Zetasizer Nano ZS, Zetasizer Pro
    • Spraytec: Spray Particle Size Analyzer
    • Sysmex FPIA-3000: Flow Particle Image Analyzer
  2. Beckman Coulter
    • LS Series: LS 13 320 XR, LS 13 320 MW
    • Multisizer Series: Multisizer 4e
    • DelsaMax Series: DelsaMax PRO, DelsaMax CORE
  3. HORIBA Scientific
    • LA Series: LA-960V2, LA-350
    • SZ Series: SZ-100
    • CAMSIZER Series: CAMSIZER X2, CAMSIZER P4
  4. Anton Paar
    • Litesizer Series: Litesizer 500, Litesizer 100
    • PSA Series: PSA 990, PSA 1090
  5. Microtrac (Nikkiso)
    • Bluewave: Particle Size Analyzer
    • SYNC: Laser Diffraction Analyzer
    • Nanotrac Wave II: Dynamic Light Scattering Analyzer
  6. Sympatec
    • HELOS Series: HELOS/BR, HELOS/KR
    • QICPIC Series: QICPIC/R, QICPIC/L
    • NANOPHOX: Photon Cross-correlation Spectroscopy Analyzer
  7. Particle Sizing Systems (PSS)
    • Nicomp Series: Nicomp 380, Nicomp DLS/ZLS
    • AccuSizer Series: AccuSizer 780, AccuSizer Mini
  8. Micromeritics
    • SediGraph III Plus: Particle Size Analyzer
    • Saturn DigiSizer II: High-Definition Digital Particle Size Analyzer
  9. Brookhaven Instruments
    • 90Plus: Particle Size Analyzer
    • ZetaPALS: Zeta Potential Analyzer
    • NanoBrook Series: NanoBrook 90Plus PALS, NanoBrook ZetaPlus
  10. Bettersize Instruments
    • Bettersizer 2600: Laser Particle Size Analyzer
    • Bettersizer S3 Plus: Image Particle Size Analyzer
    • BeNano Series: BeNano 90 Zeta
  11. Fritsch
    • ANALYSETTE 22 NeXT Series: ANALYSETTE 22 NeXT Micro, ANALYSETTE 22 NeXT Nano
  12. AimSizer
    • AS-2011: Laser Particle Size Analyzer
    • AS-2012: Dynamic Light Scattering Particle Size Analyzer
  13. CILAS
    • CILAS 990: Laser Particle Size Analyzer
    • CILAS 1090: Laser Particle Size Analyzer
  14. Entegris
    • AccuSizer A2000: Single Particle Optical Sizing System
    • Nicomp N3000: Dynamic Light Scattering System
  15. Retsch Technology
    • CAMSizer Series: CAMSizer X2, CAMSizer P4

Longi Electromechanical Company has nearly 30 years of experience in repairing particle size analyzers and can quickly repair various instruments. Additionally, we recycle and sell various particle size analyzers. Welcome to consult us.

Posted on Leave a comment

Spectrophotometer Guide: Principles, Usage, Troubleshooting, and Maintenance — PE UV Spectrophotometer, UV Spectrophotometer, Atomic Absorption Spectrophotometer, UV-Vis Spectrophotometer

Spectrophotometer Guide: Principles, Usage, Troubleshooting, and Maintenance — PE UV Spectrophotometer, UV Spectrophotometer, Atomic Absorption Spectrophotometer, UV-Vis Spectrophotometer

I. Overview

The spectrophotometer, also known as the PE UV spectrophotometer, UV spectrophotometer, atomic absorption spectrophotometer, and UV-Vis spectrophotometer, is a precise spectral analysis instrument. It analyzes the composition and content of substances by measuring their absorption or transmission of light at specific wavelengths. Widely applied in chemistry, biology, medicine, environmental science, and other fields, it is an indispensable analytical tool in laboratories.

II. Principles

The fundamental principle of the spectrophotometer is based on the Lambert-Beer Law. When a monochromatic light passes through a uniform, non-scattering medium, the absorbance A is proportional to the concentration c of the absorbing substance in the medium and the thickness l of the medium. The relationship is expressed as A = kcl, where k is a proportional constant related to the properties of the absorbing substance and the wavelength of the incident light.

The core components of a spectrophotometer include the light source, monochromator, sample chamber, detector, and data processing system. The light source provides broad-spectrum light radiation, while the monochromator decomposes this light into monochromatic light and allows specific wavelengths to pass through. The sample chamber holds the sample to be tested; when monochromatic light passes through the sample, part of the light is absorbed, and the remaining light passes through the sample into the detector. The detector converts the light signal into an electrical signal, which is then analyzed and processed by the data processing system to obtain parameters such as the sample’s absorbance or transmittance.

III. Usage Method

  1. Preheat the Instrument: Turn on the power switch and preheat the instrument for 20-30 minutes to stabilize its performance.
  2. Select Wavelength: According to experimental requirements, rotate the wavelength adjuster to indicate the desired monochromatic light wavelength.
  3. Set Sensitivity: Choose an appropriate sensitivity setting based on the absorption of light by the colored solution and keep it fixed.
  4. Adjust “0” Point: Rotate the “0” potentiometer so that the pointer on the readout indicates “0” transmittance.
  5. Adjust T=100%: Place a cuvette containing distilled water (or blank solution) in the cuvette holder, cover the dark box, and rotate the light adjuster to achieve T=100% transmittance.
  6. Measurement: Place the cuvette with the sample to be tested in the cuvette holder, gently pull the lever to allow the solution into the light path, and read the absorbance value.
  7. Shutdown: After the experiment, cut off the power and clean the cuvettes and instrument components.

IV. Common Faults and Repair Methods

  1. Unstable Digital Display
    • Causes: Environmental vibration, high air flow near the light source, external strong light interference, insufficient preheating time, desiccant failure in the photoelectric tube.
    • Solutions: Improve the working environment, extend preheating time, replace or bake the desiccant, and send for repair if necessary.
  2. Instrument Cannot Be Zeroed
    • Causes: Incomplete closure of the light gate, “100%” knob turned to the maximum, instrument dampness, circuit failure.
    • Solutions: Repair the light gate components, readjust the “100%” knob, use a hairdryer to dry the instrument and replace the desiccant, repair the circuit.
  3. Instrument Cannot Adjust to “100%”
    • Causes: Insufficient light energy, cuvette holder not in position, aging of the photoelectric conversion part, circuit failure.
    • Solutions: Increase the sensitivity multiplier, adjust the cuvette holder, replace the photoelectric conversion components, repair the circuit.
  4. Light Source Lamp Failure
    • Causes: Broken filament, weak output light spot energy.
    • Solutions: Replace with a bulb of the same specifications, adjust the position of the light source lamp to align the filament with the light output hole.
  5. Monochromator Failure
    • Causes: Tight wavelength adjuster, unreadable wavelength dial, no change in emitted light.
    • Solutions: Repair the fit between the axis and sleeve, grind the rubber friction wheel, calibrate the wavelength adjustment screw, replace the protective glass.

V. Maintenance

  1. Environmental Control: Maintain constant laboratory temperature and humidity, reduce vibration and strong light interference.
  2. Cleaning and Maintenance: Regularly clean the instrument casing and internal components, keep optical elements clean and dry.
  3. Regular Inspection: Calibrate and verify the instrument regularly to ensure the accuracy and reliability of measurements.
  4. Usage Precautions: Avoid contaminating the cuvette surface, handle with care, clean and dry correctly.

VI. Brands and Models of Spectrophotometers Repaired by Longi Electromechanical

  1. Agilent Technologies
    • Cary Series: Cary 60 UV-Vis, Cary 100 UV-Vis, Cary 300 UV-Vis, Cary 4000 UV-Vis, Cary 5000 UV-Vis, Cary 7000 UMS
  2. Thermo Fisher Scientific
    • Evolution Series: Evolution 60S, Evolution 220, Evolution 260 Bio, Evolution 350
    • NanoDrop Series: NanoDrop One/OneC, NanoDrop 2000/2000C
  3. Shimadzu
    • UV Series: UV-1800, UV-2600, UV-2700, UV-3600 Plus
    • BioSpec Series: BioSpec-nano
  4. PerkinElmer
    • LAMBDA Series: LAMBDA 25/35/45 UV/Vis, LAMBDA 365 UV/Vis, LAMBDA 650 UV/Vis/NIR, LAMBDA 850 UV/Vis/NIR, LAMBDA 1050+ UV/Vis/NIR
  5. JASCO
    • V-700 Series: V-730 UV-Vis, V-750 UV-Vis/NIR, V-760 UV-Vis/NIR, V-770 UV-Vis/NIR, V-780 UV-Vis/NIR
  6. Hitachi
    • UV-Vis/NIR Spectrophotometers: U-5100, UH4150, UH5300, U-2900/2910, U-3900/3900H, UH5700, UH4150
    • Fluorescence Spectrophotometers: F-7000, F-7100
    • Atomic Absorption Spectrophotometers (AAS): ZA3000 Series
  7. Bruker
    • TENSOR Series: TENSOR II FT-IR
  8. BioTek (Agilent)
    • Epoch Series: Epoch 2 Microplate Spectrophotometer
    • Synergy Series: Synergy H1 Hybrid Reader
  9. Horiba
    • Duetta: Fluorescence and Absorbance Spectrometer
    • FluoroMax Series: FluoroMax-4, FluoroMax Plus
  10. Beckman Coulter
    • DU Series: DU 730, DU 800
  11. Hach
    • DR Series: DR3900, DR6000
  12. Analytik Jena
    • Specord Series: Specord 50 PLUS, Specord 200 PLUS, Specord 250 PLUS
  13. Ocean Insight
    • Flame Series: Flame-S UV-Vis
    • Maya Series: Maya2000 Pro
  14. Lambda Scientific
    • LS Series: LS-1055 UV-Vis, LS-1155 UV-Vis/NIR
  15. Edinburgh Instruments
    • FS5: Fluorescence Spectrometer
    • FLS1000: Photoluminescence Spectrometer
  16. datacolor: Spectro700UV, 200R, 200M
  17. Beijing Purkinje: TAS-990AFG, Flame-Graphite Furnace Integrated Atomic Absorption Spectrophotometer

Longi Electromechanical Company specializes in the repair of spectrophotometers (PE UV spectrophotometers, UV spectrophotometers, atomic absorption spectrophotometers, UV-Vis spectrophotometers) with nearly 30 years of experience. We can quickly repair various instruments and also offer recycling and sales of various vacuum gauges. Welcome to consult.

Posted on Leave a comment

Vacuum Gauge Comprehensive Guide: Principles, Usage, Troubleshooting, and Brands

I. Overview of Vacuum Gauge

A vacuum gauge, also known as a vacuum meter or vacuum gauge tube, is an instrument specifically designed to measure gas pressure or vacuum degree. It indirectly reflects the level of vacuum by measuring the pressure generated by gas molecule movement in a confined space. In scientific research and industrial production, vacuum gauges are widely used to precisely control vacuum environments, ensuring the stability and accuracy of experiments or production processes.

II. Principles of Vacuum Gauge

The working principle of a vacuum gauge is based on the physical effects of gas molecules under different pressures. According to different measurement principles, vacuum gauges can be mainly divided into three categories: those utilizing mechanical properties, gas dynamic effects, and charged particle effects.

1. Utilizing Mechanical Properties

  • Bourdon Gauge: Utilizes the expansion of a thin copper tube under gas pressure, driving a lever and gear rotation to indicate different scales, thereby reading the pressure value.
  • Diaphragm Capacitance Gauge: The metal diaphragm deforms under different pressures, leading to changes in capacitance between it and the electrodes. The pressure value is inferred by measuring the change in capacitance.

2. Utilizing Gas Dynamic Effects

  • Pirani Gauge: Utilizes the relationship between resistance and temperature, inferring pressure by measuring the temperature change of a heated wire under different pressures.
  • Thermocouple Gauge: Similar to the Pirani Gauge but directly measures the temperature change of the heated wire instead of resistance change.

3. Utilizing Charged Particle Effects

  • Hot Cathode Ionization Gauge: Emits electrons from a hot cathode to ionize gas molecules in the vacuum, collecting the generated ion current to infer pressure.
  • Cold Cathode Ionization Gauge: Utilizes magnetically controlled discharge to ionize gas molecules, collecting ion current for pressure measurement.

III. Usage Methods of Vacuum Gauge

  1. Select the Appropriate Vacuum Gauge: Choose the suitable model and range of the vacuum gauge based on measurement needs.
  2. Calibrate the Vacuum Gauge: Calibrate before use to ensure the accuracy of measurement results.
  3. Connect the Vacuum Gauge: Connect the vacuum gauge to the device or container being measured, ensuring good sealant at the connection point.
  4. Start Measurement: Turn on the device or container being measured, wait for it to reach a stable state, and then turn on the vacuum gauge for measurement.
  5. Read Data: After stabilization, read the data displayed on the vacuum gauge, paying attention to data stability and accuracy.
  6. End Measurement: After measurement, turn off the vacuum gauge and the device or container being measured, and properly store the vacuum gauge.

IV. Faults and Repair Methods of Vacuum Gauge

1. Unable to Start

  • Check the power supply: Confirm whether the vacuum gauge is properly plugged in and the plug is secure.
  • Check the fuse: Inspect whether the fuse is burned out and replace it if necessary.
  • Check the switch: Confirm the correct position and settings of the switch.

2. Inaccurate Readings

  • Check the connection port: Confirm whether the connection port is loose or tightly connected.
  • Check the range setting: Confirm whether the range setting is correct to avoid exceeding the measurement range.
  • Check the sensor: A damaged sensor may lead to inaccurate readings and needs replacement.

3. Readings Too High or Too Low

  • Check gas flow: Abnormal gas flow may affect readings, so check whether the gas flow is normal.
  • Check vacuum tube quality: Poor quality of the vacuum tube may also lead to inaccurate readings and needs replacement.

4. Air Leakage

  • Check sealant: Confirm the sealant of the vacuum gauge and vacuum tube, and perform sealing treatment if necessary.
  • Detect hidden leaks: Use methods such as gas infusion to detect and repair hidden leak points.

Preventive Measures

  • Regular inspection: Periodically maintain and inspect the vacuum gauge to ensure its normal operation.
  • Keep clean: Maintain the cleanliness of the vacuum gauge to avoid interfering with measurement results.
  • Safe operation: Pay attention to operational safety to avoid equipment damage or accidents caused by improper operation.

V. Summary

As an important tool for measuring vacuum degree or pressure, vacuum gauges play a crucial role in scientific research and industrial production. Understanding their working principles, mastering correct usage methods, and handling common faults are essential for ensuring the accuracy of measurement results and the stable operation of equipment. Meanwhile, regular maintenance and inspection of vacuum gauges are also key to ensuring their long-term stable performance.

VI. Brands and Models of Vacuum Gauges Repaired by Longi Electromechanical

  1. Inficon
    • Sky CDG025D: Capacitance Diaphragm Gauge
    • Sky CDG100D: Capacitance Diaphragm Gauge
    • Sky CDG200D: Capacitance Diaphragm Gauge
    • Skyview: Combination Pirani and Cold Cathode Gauge
  2. Edwards
    • nEXT Series: nEXT730D, nEXT930D
    • Active Pirani Series: APG100, APG200
    • Active Inverted Magnetron Series: AIM-X, AIM-S
  3. Pfeiffer Vacuum
    • ActiveLine Series: TPR 280, TPR 270
    • DigiLine Series: DPG 102, DPG 109
    • Compact Series: PCR 260, PCR 270
  4. MKS Instruments
    • Granville-Phillips Series: 370 Stabil-Ion, 375 Convectron, 390 Micro-Ion
    • Baratron Series: 627D, 629A
    • PDR Series: PDR2000
  5. Leybold
    • Thermovac Series: TTR 91, TTR 101
    • Ceravac Series: CTR 100, CTR 101
    • Ionivac Series: ITR 90, ITR 91
  6. Agilent Technologies
    • ConvecTorr: Convectron Gauge
    • UHV Ionization Gauge: Ultrahigh Vacuum Gauge
    • FRG-700: Full Range Gauge
  7. Teledyne Hastings
    • DV-6: Thermocouple Vacuum Gauge
    • HPM-2002: Digital Vacuum Gauge
    • HVG-2020B: Digital Vacuum Gauge
  8. Brooks Instrument
    • 5866: Capacitance Manometer
    • 5850: Mass Flow Controller
    • 5863: Digital Pressure Gauge
  9. Kurt J. Lesker
    • 945 Series: Inverted Magnetron Gauge
    • 350 Series: Pirani Gauge
    • 354 Series: Ionization Gauge
  10. ULVAC
    • G-Tran Series: G-Tran ST1, G-Tran PT1
    • SW-1 Series: SW-1
    • M-100 Series: M-100
  11. InstruTech
    • B-RAX 3000: Vacuum Gauge Controller
    • CDG-500: Capacitance Diaphragm Gauge
    • IGC100: Cold Cathode Gauge
  12. Thyracont
    • Smartline Series: VSR, VSP
    • Digitalline Series: VD8, VD12
    • Analogline Series: VMA, VPA
  13. Agilent
    • XGS-600: Gauge Controller
    • FRG-720: Full Range Gauge
    • UHV-24: Ultra High Vacuum Gauge
  14. Sens4
    • VQM-83: Vacuum Quality Monitor
    • VSM-32: Vacuum Sensor Module
  15. Dycor (AMETEK)
    • Dycor Quadlink: Residual Gas Analyzer
    • Dycor 1000: Vacuum Gauge

Longi Electromechanical Company has nearly 30 years of experience in repairing vacuum gauges and can quickly repair various instruments. Additionally, they recycle and sell various vacuum gauges. Welcome to consult.

Posted on Leave a comment

Analysis Balance Overview, Principle, Brand,Usage, Faults, and Maintenance Methods

Analysis Balance Overview, Principle, Usage, Faults, and Maintenance Methods

Analysis Balance Overview

The analysis balance, a high-precision weighing instrument, finds extensive application in laboratories, factories, and scientific research. It is employed to accurately measure the mass of objects and boasts high precision, stability, and adaptability to various substances, including powders, liquids, and gases. The advent of analysis balances has significantly enhanced the accuracy of experimental results and the control precision of production processes.

Principle

Designed based on the principle of lever balance, the analysis balance relies on adjusting the weight of counterweights to balance the mass of the measured object. Specifically, the beam of the balance has small pans at both ends, with one end for counterweights and the other for the object to be measured. When the masses at both ends are equal, the pointer fixed on the beam aligns with the central scale, indicating that the balance is in equilibrium. Modern analysis balances incorporate advanced sensor technology and microelectronics, further enhancing measurement precision and stability through electromagnetic force balance principles.

Usage Method

  • Placement and Adjustment: Position the balance on a horizontal and stable surface, ensuring it is level by adjusting the foot pads.
  • Zero Calibration: Press the “ON/OFF” button. Once the balance displays “0.0” or “0.00”, place the object to be weighed in the center of the balance pan. Wait for the digital display to stabilize, then press the “TARE” key to perform tare operation.
  • Weighing: Place the object to be weighed in the center of the balance pan. After the digital display stabilizes, the displayed value represents the mass of the object.

Precautions

  • Ensure the mass of the measured object does not exceed the balance’s capacity.
  • Avoid direct contact between the balance pan and wet objects or chemical reagents.
  • During weighing, place the object on the left and counterweights on the right, maintaining a stable environment inside and outside the balance.

Faults and Maintenance Methods

  • Display Value Continually Changes:
    • Fault Causes: Unbalanced balance, poor installation environment, volatile or hygroscopic substances being weighed.
    • Maintenance Methods: Level the balance, choose a suitable installation environment, and use containers to weigh volatile or hygroscopic substances.
  • Obviously Incorrect Display Result:
    • Fault Causes: Tare operation not performed, unbalanced balance, long-term lack of calibration.
    • Maintenance Methods: Perform tare operation, check and level the balance, and regularly calibrate it.
  • No Display or Display of Dashes:
    • Fault Causes: Power issues, damaged display.
    • Maintenance Methods: Check power plug and wire connections, replace damaged fuses or displays.
  • Hanging Ear Falls Off or Tilts:
    • Fault Causes: Too rapid opening or closing of the balance, or improper operation.
    • Maintenance Methods: Gently reposition the hanging ear and adjust it to a stable state. If unstable, use tools like needle-nose pliers for adjustment.
  • Internal and External Dampers Collide or Slightly Friction:
    • Fault Causes: Improper damper position or unbalanced balance.
    • Maintenance Methods: Check the balance’s level state, adjust the positions of internal and external dampers until there is no friction.
  • Projection Screen Displays Incorrect Scale Position:
    • Fault Causes: Reflecting mirror offset.
    • Maintenance Methods: Rotate the screw beside the projection screen to adjust the reflecting mirror position, ensuring the scale falls exactly on the projection screen.

Conclusion

As a high-precision measuring tool, the analysis balance plays a crucial role in scientific research, production control, and quality inspection. Understanding its principle, mastering correct usage methods, and handling common faults are vital for ensuring measurement accuracy and extending the balance’s lifespan. Regular maintenance and calibration can further enhance the performance and stability of the analysis balance.

Brands and Models of Analysis Balances Repaired by Longi Electromechanical

  1. Mettler Toledo
    • XPR Series: XPR2, XPR6U, XPR10, XPR26
    • XS Series: XS204, XS104, XS105
    • MS Series: MS104TS, MS204TS
  2. Sartorius
    • Cubis II Series: Cubis II MSA, Cubis II MSU, Cubis II MSE
    • Secura Series: Secura 124-1S, Secura 224-1S
    • Quintix Series: Quintix 124-1S, Quintix 224-1S
  3. Ohaus
    • Explorer Series: Explorer EX224, Explorer EX324, Explorer EX124
    • Adventurer Series: Adventurer AX224, Adventurer AX324, Adventurer AX124
    • Pioneer Series: Pioneer PX124, Pioneer PX224
  4. A&D Weighing
    • BM Series: BM-20, BM-22, BM-252
    • GX-A/GF-A Series: GX-224A, GF-224A
    • HR-AZ/HR-A Series: HR-250AZ, HR-300AZ
  5. Shimadzu
    • AP Series: AP225W, AP125W
    • AU Series: AUW-D, AUW220D
  6. Adam Equipment
    • Nimbus Series: Nimbus NBL 124e, Nimbus NBL 224e
    • Highland Series: Highland HCB 123, Highland HCB 223
  7. Radwag
    • XA 4Y Series: XA 220.4Y.A, XA 82/220.4Y
    • AS R2 Series: AS 82/220.R2, AS 310.R2
  8. Kern & Sohn
    • ABT Series: ABT 120-5DNM, ABT 220-5DNM
    • ALS-A/ALJ-A Series: ALS 120-4A, ALJ 220-4A
  9. Scientech
    • ZSA Series: ZSA 80, ZSA 120
    • SA Series: SA 80, SA 120
  10. Precisa
    • 321 Series: 321LS125M, 321LS220M
    • 360 Series: 360EP225SM-DR, 360ES125SM
  11. Denver Instrument
  12. Pinnacle Series: Pinnacle PI-225D, Pinnacle PI-114
  13. Sartorius (Old Models)
    • Analytical Series: Analytical A200S, Analytical A120S
  14. Setra Systems
    • Super II Series: Super II 225, Super II 125

Longi Electromechanical has nearly 30 years of experience in repairing analysis balances, enabling swift repairs for various instruments. Additionally, we recycle and sell various analysis balances. Welcome to consult.

Posted on Leave a comment

Comprehensive Analysis of Microtomes: Principles, Brand,Usage Methods, and Troubleshooting Guide

Comprehensive Analysis of Microtomes: Principles, Usage Methods, and Troubleshooting Guide

Overview of Microtomes

Microtomes are mechanical devices specifically designed to cut objects (such as food, medicinal herbs, plastics, paper, etc.) into thin slices or sections. They are widely used in various fields including food processing, medicinal herb slicing, scientific research (such as cell and tissue sectioning), and papermaking. With their stability, high precision, ease of operation, and continuous and uniform slicing, microtomes have become indispensable equipment in many industries.

Principles

The working principles of microtomes are mainly realized through the transmission system, cutting blade, cutting process, and discharge system.

  • Transmission System: Microtomes typically use electric motors as the power source. The motor’s rotational speed is transmitted to the blade through a transmission system consisting of a motor, flywheel, belts, and gears, ensuring the blade rotates quickly and stably.
  • Cutting Blade: The cutting blade is usually made of high-hardness materials (such as stainless steel). Its design and manufacturing quality directly affect the cutting effect and performance. The blade cuts the material through rapid rotation.
  • Cutting Process: The material to be cut is fed into the cutting area of the microtome through a material feeding device, where the blade performs the cutting. By adjusting the blade’s angle, rotational speed, and cutting thickness, slices of different thicknesses can be obtained.
  • Discharge System: The sliced material is removed from the microtome through a discharge system such as a conveyor belt, chute, or transfer device for further processing or packaging.

Usage Methods

  1. Preparation Stage: Cut the ingredients or material to be cut into appropriate sizes, remove unwanted parts, and prepare the microtome’s blade.
  2. Equipment Adjustment: Place the microtome on a stable table and adjust the blade’s cutting thickness according to the material’s thickness.
  3. Start Cutting: Place the material on the blade, ensuring it is of appropriate size to avoid blade damage. Start the microtome and gently hold the material to allow the blade to cut.
  4. Cleaning and Storage: After cutting, clean the microtome and blade with water, and store them after drying. Place the microtome in a safe location, out of reach of children.

Common Faults and Repair Methods

  1. Power Failure:
    • Phenomenon: The microtome cannot start normally or suddenly stops working.
    • Solution: Check if the power plug is inserted, if the power cord is damaged, if the power switch is on, and if the fuse is blown. If the power is normal, it may be a motor fault, and professional maintenance personnel should be contacted for repair.
  2. Poor Cutting Effect:
    • Phenomenon: The cutting surface is uneven, the dimensions are inaccurate, or excessive powder is produced.
    • Solution: Check if the blade is sharp and replace it if not; adjust the slicing thickness, speed, and pressure to ensure correct parameter settings; check if the material is too hard or sticky, and adjust the material state accordingly.
  3. Excessive Noise:
    • Phenomenon: Abnormal noise occurs during operation.
    • Solution: Check if the transmission components are loose or damaged, and repair or replace them in a timely manner; regularly clean and maintain the microtome to reduce noise generation.
  4. Safety Protection Device Fault:
    • Phenomenon: The safety device fails or malfunctions, causing the microtome to operate abnormally or stop.
    • Solution: Check if the safety device is damaged or loose, and repair or replace it in a timely manner; check if the safety device’s circuit is intact, and contact professional maintenance personnel for repair if there are issues.
  5. Material Jamming or Blockage:
    • Phenomenon: The material gets stuck or blocked during the slicing process.
    • Solution: Clean the residual material inside the microtome to ensure the slicing channel is clear; adjust the material feeding speed and quantity to avoid excessive material causing blockage; check if the microtome’s feeding device and transmission components are working normally, and repair them in a timely manner.

Conclusion

As an efficient and precise cutting device, microtomes play a significant role in modern production and scientific research. Understanding their working principles, correct usage methods, as well as common faults and repair methods is crucial for improving production efficiency and ensuring equipment safety.

Brands and Models of Microtomes Repaired by Longi Electromechanical Company

  1. Leica Biosystems
    • RM2235: Rotary Microtome
    • RM2245: Rotary Microtome
    • RM2255: Fully Automated Rotary Microtome
    • CM1950: Cryostat Microtome
    • CM1860: Cryostat Microtome
    • UC7: Ultramicrotome
  2. Thermo Fisher Scientific
    • HM355S: Automatic Microtome
    • HM340E: Electronic Rotary Microtome
    • HM325: Manual Rotary Microtome
    • CryoStar NX70: Cryostat Microtome
    • CryoStar NX50: Cryostat Microtome
  3. Sakura Finetek
    • Accu-Cut SRM 200: Manual Rotary Microtome
    • Accu-Cut SRM 300: Manual Rotary Microtome
    • Tissue-Tek Cryo3 Flex: Cryostat Microtome
    • Tissue-Tek AutoSection: Automated Microtome
  4. Microm (part of Thermo Fisher Scientific)
    • HM355S: Automatic Microtome
    • HM340E: Electronic Rotary Microtome
    • HM325: Manual Rotary Microtome
  5. RMC Boeckeler
    • PT-PC PowerTome: Ultramicrotome
    • PT-X PC PowerTome: Ultramicrotome
    • CR-X Cryo: Cryo Ultramicrotome
    • MT-990: Rotary Microtome
  6. Diatome
    • Histo Diamond Knife: Knife for ultramicrotome
    • Ultra Diamond Knife: Knife for ultramicrotome
  7. Medite
    • M530: Rotary Microtome
    • T690: Semi-automatic Rotary Microtome
    • T530: Manual Rotary Microtome
  8. Slee Medical
    • CUT 6062: Fully Automated Rotary Microtome
    • CUT 5062: Semi-automatic Rotary Microtome
    • CUT 4062: Manual Rotary Microtome
    • MNT Modular: Cryostat Microtome
  9. Bright Instrument Company
    • Bright 8250: Rotary Microtome
    • Bright 5040: Sliding Microtome
    • Bright OTF5000: Cryostat Microtome
  10. Sakura Seiki
    • SRM 200: Rotary Microtome
    • SRM 300: Rotary Microtome
  11. Anglia Scientific
    • AS-400: Automatic Rotary Microtome
    • AS-300: Manual Rotary Microtome
  12. Thermo Shandon
    • Finesse 325: Manual Rotary Microtome
    • Finesse ME+: Motorized Rotary Microtome
  13. Reichert Technologies
    • Jung Histocut 820: Rotary Microtome
    • Jung HistoStat 900: Sliding Microtome
  14. Yamato
    • MCT-3: Manual Rotary Microtome
  15. SLEE Medical
    • CUT 4062: Manual Rotary Microtome
    • CUT 5062: Semi-Automatic Rotary Microtome
    • CUT 6062: Fully Automated Rotary Microtome
  16. Disco
    • DAD Series: DAD321, DAD322, DAD3350
    • DFD Series: DFD6362, DFD641, DFD651
    • MQMA Series
    • DFG Series

Longi Electromechanical Company has nearly 30 years of experience in repairing microtomes and can quickly repair various instruments. Additionally, they recycle and sell various types of microtomes. Welcome to consult.

Posted on Leave a comment

Comprehensive Analysis of Headspace Sampler: Principles,Brand, Usage Methods, and Troubleshooting Guide

I. Overview of Headspace Sampler

The headspace sampler is an efficient and convenient sample pretreatment method in gas chromatography. Its principle involves placing the sample to be tested in a sealed container, heating it to volatilize the volatile components, achieving equilibrium in the gas-liquid (or gas-solid) phases, and then directly extracting the top gas for chromatographic analysis to detect the composition and content of volatile components in the sample. This technique simplifies the sample pretreatment process, avoids the interference of organic solvents, and reduces contamination of the chromatographic column and injection port.

II. Principles of Headspace Sampler

The working principles of the headspace sampler are mainly divided into two types: solution headspace and solid headspace.

  • Solution Headspace: The sample is dissolved in an appropriate solvent and placed in a headspace vial, which is then heated for a certain period to allow the residual solvent to reach equilibrium in the gas-liquid phases. Subsequently, a quantitative amount of gas is sampled for measurement.
  • Solid Headspace: The solid sample is directly placed in the headspace vial and heated for a certain period to allow the volatile components to reach equilibrium in the gas-solid phases. Afterwards, a quantitative amount of gas is sampled for measurement.

III. Usage Methods

Preparation Stage:

  1. Accurately transfer the sample to the headspace vial and seal it.
  2. Place the headspace vial in the heating oven and allow it to equilibrate for the preset time.

Parameter Setting:

  1. Set parameters such as heating temperature of the headspace vial, temperature of the quantitative tube, and temperature of the transfer line as needed.
  2. Ensure that the headspace sampler is correctly connected to the gas chromatograph, and set the appropriate carrier gas flow rate and split ratio.

Sampling Operation:

  1. Use the pressure method or equilibrium method to introduce the headspace gas into the gas chromatograph.
  2. After starting the sampling, wait for the sample peak to finish, press the cleaning button to clean, and then proceed with the next sample.

Data Analysis:

  1. Analyze the data obtained from the gas chromatograph to calculate the composition and content of volatile components in the sample.

IV. Common Faults and Repair Methods

Unable to Sample Normally:

  • Fault Causes: Insufficient pressure, valve failure, sealing issues, clogged sampling needle.
  • Repair Methods: Check the gas source pressure, clean or replace the valve, replace sealing components, clean the sampling needle, and ensure it is dry before reinstallation.

Gas Leakage:

  • Fault Causes: Loose connections or aged sealing components.
  • Repair Methods: Check the tightness of connections, replace aged or damaged sealing components, and apply sealing glue if necessary to enhance sealing.

Inaccurate Sampling Volume:

  • Fault Causes: Clogged sampling needle, stuck or leaky valve.
  • Repair Methods: Regularly clean the sampling needle, calibrate the sampling volume, and inspect and address valve faults.

Slow Sampling Speed:

  • Fault Causes: Insufficient gas source pressure, clogged sampling needle, stuck valve.
  • Repair Methods: Check and repair the gas source pressure issue, clean the sampling needle, and address the stuck valve problem.

Other Mechanical Faults:

  • For mechanical faults such as rusted lifting rods, follow the equipment manual or disassembly videos provided by technical support to disassemble, remove rust, lubricate, and reinstall.

V. Conclusion

As an important tool in gas chromatographic analysis, the headspace sampler is widely used in various fields due to its efficiency and convenience. Correctly understanding and operating the headspace sampler, as well as promptly addressing common faults, are crucial for ensuring the accuracy and efficiency of experimental results. This article summarizes the basic principles, usage methods, and common fault repair methods of the headspace sampler, aiming to provide comprehensive reference and guidance for users.

VI. Brands and Models of Headspace Samplers Repaired by Longi Electromechanical Company

  1. Agilent Technologies
    • 7697A: Headspace Sampler
    • 7650A: Automatic Headspace Sampler
    • 7694E: Headspace Sampler
  2. PerkinElmer
    • TurboMatrix Series: TurboMatrix 40, TurboMatrix 110, TurboMatrix 16, TurboMatrix 650 ATD, TurboMatrix 350 ATD
  3. Thermo Fisher Scientific
    • TriPlus Series: TriPlus 300 HS, TriPlus 500 HS, TriPlus 100 LS
  4. Shimadzu
    • HS-20 Series: HS-20, HS-10
  5. GERSTEL
    • MultiPurpose Sampler (MPS): Integrates headspace, solid-phase microextraction (SPME), and other multifunctional sampling
    • Dual Headspace Sampler: Efficient multi-sample sampling
  6. CTC Analytics (PAL System)
    • PAL RSI: Robotic Sample Injector with headspace option
    • PAL RTC: Robotic Tool Change system with headspace option
  7. Teledyne Tekmar
    • HT3: Headspace Autosampler
    • Versa: Automated Headspace Vial Sampler
  8. LECO Corporation
    • PEGASUS HT-C: Headspace Sampler
    • HTS: High Throughput Sampler
  9. Markes International
    • CIA Advantage: High-capacity headspace autosampler
  10. EST Analytical
    • Evolution: Automated Headspace Sampler
  11. OI Analytical (Xylem)
    • 4560: Purge-and-Trap Sample Concentrator with headspace option
  12. Alpha MOS
    • HS100: Headspace Autosampler
  13. Dani Instruments
    • Master DHS: Dynamic Headspace Sampler
    • Master SHS: Static Headspace Sampler
  14. Entech Instruments
    • 7100A: Preconcentrator with headspace option
  15. Horizon Technology
    • SmartPrep: Automated Extraction System with headspace option

Longi Electromechanical Company has nearly 30 years of experience in repairing headspace samplers and can quickly repair various instruments. Additionally, the company recycles and sells various headspace samplers. Welcome to consult.

Posted on Leave a comment

Air Sampler Overview, Principle, Usage Method, and Troubleshooting Summary

Air Sampler Overview

Air samplers are crucial environmental monitoring tools widely used in fire预警, air quality monitoring, and industrial waste gas emission detection. These devices utilize specific suction mechanisms to draw air samples from the environment into the equipment, where various pollutants in the air are separated and detected using physical or chemical methods. This provides vital data support for environmental protection, fire预警, and industrial production.

Principle

The basic principle of an air sampler involves utilizing an internal suction pump or power system to draw air samples from the detection area through air sampling tubing into a detection chamber. Inside the chamber, high-precision sensors and separation techniques are employed to convert pollutants in the air into measurable substances, which are then quantitatively analyzed by the analysis system. This process requires the equipment to possess high accuracy and stability, as well as adaptability to various complex environmental conditions.

Usage Method

Preparation:

  • Inspect the instrument for any damage, ensuring the sampling device, analysis system, power supply, etc., are functioning properly.
  • Confirm the cleanliness of the sampling device to avoid contamination.

Parameter Setting:

  • Set the parameters of the sampling device according to the types and concentration ranges of pollutants to be detected, such as sampling time and flow rate.

Installation of Sampling Device:

  • Connect the sampling head of the sampler to the sampling point, ensuring a tight connection and avoiding interference from other objects.
  • Avoid exposing the sampling head to high-humidity environments.

Sampling Initiation:

  • Press the start button on the sampler to begin sampling.
  • Maintain a stable environment at the sampling point to avoid interference with sampling results.

Sampling Completion:

  • The sampling device will automatically stop working according to the set sampling time.
  • Disconnect the sampling device from the sampling point and turn off the sampler.
  • Promptly clean and disinfect the sampling device to prevent the spread of contamination.

Data Analysis:

  • Send the collected samples to a laboratory for analysis to obtain pollutant concentration data.
  • Use appropriate analysis methods (e.g., chromatography, mass spectrometry) to interpret and apply the data.

Troubleshooting and Repair Methods

  • Display Screen Not Working:
    • Possible causes: Poor power contact or damaged display screen.
    • Solution: Check power connection and replace damaged components.
  • Pump Not Working:
    • Possible causes: Pump stuck or circuit failure.
    • Solution: Clean or replace the sampling pump, check and replace the circuit board.
  • Backflow Phenomenon:
    • Possible causes: Operational error leading to absorption liquid being sucked into the instrument.
    • Solution: Disconnect the connection, clean the air path with anhydrous ethanol, and let the pump run idle to evaporate residual liquid.
  • No or Reduced Bubble Flow Rate:
    • Possible causes: Leakage causing the gauge pressure to be lower than normal.
    • Solution: Check the pipeline and drying cylinder for leaks and repair promptly.
  • Flowmeter Float Not Moving:
    • Possible causes: Float stuck due to liquid intake.
    • Solution: Clean or replace the flowmeter.

Brands and Models of Air Samplers Repaired by Longi Electromechanical

  1. SKC Inc.:
    • AirChek Series: AirChek TOUCH, AirChek Essential, AirChek XR5000
    • PCXR Series: PCXR4, PCXR8
    • Universal Series: Universal XR
    • Leland Legacy: High-flow air sampling pump
  2. Gilian (Sensidyne):
    • GilAir Series: GilAir Plus, GilAir 5, GilAir 3, GilAir 2
    • Gilian BDX-II: Low-flow air sampling pump
    • Gilian LFS-113: Low-flow air sampling pump
  3. TSI Incorporated:
    • AeroTrak Series: AeroTrak 9306, AeroTrak 9310, AeroTrak 9350
    • DustTrak Series: DustTrak II 8530, DustTrak DRX 8533
  4. Casella:
    • VAPex Series: VAPex Pro, VAPex Elite
    • Apex2 Series: Apex2, Apex2 Plus, Apex2 Pro
  5. Thermo Fisher Scientific:
    • TEOM Series: TEOM 1405, TEOM 1400ab
    • Partisol Series: Partisol 2000i, Partisol 2025i
  6. APEX Instruments:
    • XC-6200 Series: XC-6200
    • XC-6000 Series: XC-6000
    • XC-5000 Series: XC-5000
  7. Buck Libra (A.P. Buck):
    • Buck Libra Series: Buck Libra Plus LP-5, Buck Libra Plus LP-7, Buck Libra Plus LP-12
  8. Zefon International:
    • Escort ELF: High-flow air sampling pump
    • Bio-Pump Plus: Biological air sampling pump
  9. Hi-Q Environmental Products Company:
    • CF-1001: Large-flow air sampler
    • CF-902: Environmental air sampler
  10. Sibata:
    • MP-Sigma: Personal air sampling pump
    • MP-Σ100N: Low-flow air sampling pump
  11. GASTEC Corporation:
    • GV-110 Series: GV-110S, GV-110R
  12. BioStage (EAA, Inc.):
    • BioStage Impactor: Air microorganism sampler
  13. AirSamplers.com:
    • APB Series: APB-350, APB-360
  14. Advanced Instruments:
    • Zefon Escort: High-flow air sampling pump
    • Zefon Bio-Pump: Biological air sampling pump
  15. Interscan Corporation:
    • LD Series: LD-3, LD-4

Longi Electromechanical Company has nearly 30 years of experience in repairing headspace samplers. We can quickly repair various instruments and also recycle and sell various headspace samplers. Welcome to consult.

Posted on Leave a comment

Maintenance and Servicing of NETZSCH TG209 Thermogravimetric Analyzer

Proper maintenance and servicing of the NETZSCH TG209 Thermogravimetric Analyzer are crucial for ensuring its long-term stable operation and measurement accuracy. Below are key steps and considerations for maintenance:

I. Daily Cleaning

  • Sample Plate Cleaning: Before and after each measurement, the sample plate should be kept clean. Prior to sample placement, use air to blow off dust or an appropriate cleaning solution to clean, ensuring no damage to the sample.
  • Temperature Controller Cleaning: Regularly clean the temperature controller with a cleaning solution or air to ensure accurate temperature settings.
  • Computer Cleaning: Regularly clean the interior and exterior of the computer, as well as input/output devices. It is recommended to clean at least once a year.

II. Component Inspection and Replacement

  • Accessory Inspection: Regularly inspect accessories such as heating elements, controllers, and temperature sensors to ensure they are in good condition. Timely replace aged or damaged components.
  • Filter Replacement: Replace oil absorption filters, filter elements, and gas filters regularly based on usage to prevent contaminants from affecting measurement results.
  • Seal Ring Inspection and Replacement: Regularly inspect the main unit and analyzer for oil leaks. If found, promptly replace seal rings or gaskets.

III. Software and System Settings

  • Software Updates: Keep the control software of the thermogravimetric analyzer up to date to utilize the latest features and bug fixes.
  • System Configuration: Ensure all system settings, such as temperature range and heating rate, are correct to meet experimental requirements.

IV. Regular Maintenance

  • Professional Maintenance: Apply for regular maintenance services from NETZSCH or authorized service centers, including deep cleaning, calibration, and performance checks.
  • Long-term Storage: If the thermogravimetric analyzer will be unused for a long period, store and maintain it according to the manufacturer’s recommendations to prevent component aging and damage.

V. Operational Precautions

  • Sample Preparation: Ensure samples are in a uniform powder state and that sample pans are dry to reduce measurement errors.
  • Operational Norms: Follow the operational procedures and safety guidelines of the NETZSCH TG209 Thermogravimetric Analyzer during operation to ensure the safety of operators and equipment.
  • Maintenance Log: Establish a maintenance log to record the time, content, and replaced components of each maintenance, facilitating the tracking of equipment maintenance history and performance changes.

VI. Specific Maintenance Tasks

  • Support Rod Cleaning: After long-term use, residue from sample decomposition may adhere to the support rod, affecting test accuracy. Therefore, regularly burn the support rod at high temperatures in air or oxygen to remove residue (typically once a week, depending on sampling frequency and instrument contamination).
  • Furnace Maintenance: For models such as the NETZSCH TG209F1 with ceramic furnaces, special attention should be given to the furnace’s corrosion resistance and sealing. Regularly inspect the furnace for cracks or damage and promptly repair.

In summary, the maintenance and servicing of the NETZSCH TG209 Thermogravimetric Analyzer require comprehensive consideration of daily cleaning, component inspection and replacement, software and system settings, regular maintenance, operational precautions, and specific maintenance tasks. Through scientific maintenance measures, the long-term stable operation and measurement accuracy of the instrument can be ensured.


Posted on Leave a comment

Viscosity Meter Comprehensive Analysis: Principles, Usage Methods, Common Faults, and Repair Methods for Enhanced Measurement Accuracy

Overview of Viscosity Meters

A viscosity meter (Viscosimeter) is an instrumental device used for the physical analysis of fluid (liquid and gas) viscosity. Viscosity, a physical quantity representing internal friction during fluid flow, reflects the fluid’s resistance to deformation and serves as a crucial indicator for assessing the quality of certain finished or semi-finished products. Varying with fluid type and temperature, viscosity finds wide application in fields such as petroleum, chemicals, electric power, metallurgy, and national defense.

Principles

Viscosity meters are primarily categorized into three types based on operation mode: capillary, rotational, and vibrational.

  • Capillary Viscosity Meters: The common example is the Saybolt viscometer, which works by measuring the time taken for a sample to flow through a capillary tube to determine its viscosity. The sample container, filled with the test sample and placed in a constant temperature bath, indicates higher viscosity when the sample takes longer to flow through the capillary.
  • Rotational Viscosity Meters: One of the most commonly used in laboratories is the cone-and-plate viscometer. It operates through an electric motor driving a plate to rotate at a constant speed, maintaining the sample between two plates via capillary action. The friction between sample molecules drives the cone’s rotation, and the torque detected by a torsion spring reflects the sample’s viscosity after the cone rotates a certain angle.
  • Vibrational Viscosity Meters: Examples include ultrasonic viscometers, which emit vibrations of a specific frequency through a vibration sensor. By measuring changes in vibration amplitude or the driving force required to maintain consistent amplitude, the viscosity is calculated. When the vibrating element is immersed in the test sample, its amplitude correlates with the sample’s viscosity and density.

Usage Methods

  • Ensure the instrument is level.
  • Avoid bubbles when inserting the rotor into the sample; tilt insertion followed by straightening ensures the rotor does not touch the container walls or bottom, and the sample exceeds the prescribed mark.
  • Keep the rotor clean and dry before measuring different samples to prevent residue from affecting accuracy.
  • Pay special attention to the temperature of the liquid being measured, ideally maintaining it at a specified temperature point with a precision of no more than 0.1℃ deviation.
  • Select the appropriate rotor and speed based on the sample’s viscosity, adjusting the speed to keep readings within a reasonable range.
  • Connect the rotor correctly, supporting the spindle with the left hand while rotating the rotor with the right to protect internal components.
  • Regularly calibrate the instrument using viscosity standard liquids to ensure measurement accuracy.

Faults and Repair Methods

  • Inaccurate Readings:
    • Check the power supply for stability and damage.
    • Calibrate the instrument using standard liquids.
    • Clean the sensor and ensure secure connections.
    • Confirm the suitability, uniformity, and sufficiency of the sample.
  • Rotor Failure to Rotate:
    • Inspect the rotor and bearing for damage or lubrication needs.
    • Check the circuit board and connections for damage or poor contact.
  • Display Issues:
    • Verify the display’s functionality and proper connection.
    • Ensure the control software is up to date.
  • Data Transmission Problems:
    • Confirm correct and compatible data cable connections.

Maintenance Plan

  • Regularly clean the rotor and viscometer after measurements to avoid residue.
  • Establish a maintenance schedule to periodically inspect and replace worn parts, maintaining equipment performance.

Professional Services

For complex faults, contact the manufacturer or professional technicians for repairs.

Brands and Models Repaired by Longi Electromechanical Company

  1. Brookfield (AMETEK)
    • DVNext Series: DVNext Rheometer, DVNext Cone/Plate Rheometer
    • DV2T Series: DV2T Viscometer, DV2T Extra Viscometer
    • DV1 Series: DV1 Viscometer
    • CAP Series: CAP 2000+ Viscometer, CAP 1000+ Viscometer
    • R/S Series: R/S Plus Rheometer
  2. Anton Paar
    • MCR Rheometer Series: MCR 72, MCR 92, MCR 102, MCR 302, MCR 502
    • RheolabQC: Compact Rheometer
    • ViscoQC Series: ViscoQC 100, ViscoQC 300
  3. TA Instruments (Waters Corporation)
    • Discovery Series: Discovery Hybrid Rheometer (DHR-1, DHR-2, DHR-3)
    • AR Series: AR 2000ex, AR-G2 Rheometer
  4. Malvern Panalytical
    • Kinexus Series: Kinexus Lab+, Kinexus Pro+, Kinexus Ultra+
    • Rotational Viscometers: SV-10, SV-100
  5. Thermo Fisher Scientific
    • HAAKE MARS Series: HAAKE MARS iQ, HAAKE MARS iQ Air
    • HAAKE Viscotester Series: HAAKE Viscotester 1 Plus, HAAKE Viscotester 2 Plus
  6. RheoSense
    • m-VROC: Microfluidic Viscometer
    • VROC Initium: Automated Viscometer
  7. Cannon Instrument Company
    • Cannon CT-1000: Constant Temperature Bath
    • Cannon PolyVISC: Automated Viscometer
    • Cannon MiniQV-X: Rapid-Viscosity Analyzer
  8. Fungilab
    • Smart Series: Smart L, Smart R, Smart Q
    • Viscolead Series: Viscolead ADV, Viscolead PRO
    • Alpha Series: Alpha L, Alpha R
  9. Hydramotion
    • ViscoJet Series: ViscoJet 500, ViscoJet 700
    • ViscoSense Series: ViscoSense 300, ViscoSense 600
  10. A&D Company
    • SV-A Series: SV-1A, SV-10A, SV-100A
  11. Lamy Rheology
    • RM200 Series: RM200 Touch
    • RM100 Series: RM100 Touch
  12. Grace Instrument
    • M5500: Automated Rheometer
    • M5600: High Temperature High Pressure Viscometer
  13. PCS Instruments
    • MTM2: Mini-Traction Machine
    • ETM: EHD2 Traction Machine

Longi Electromechanical Company offers long-term repair services for viscosity meters, with nearly 30 years of experience in quickly repairing various instruments. Additionally, we recycle and sell various viscosity meters. Welcome to consult.

Posted on Leave a comment

Comprehensive Analysis of Smoke and Fire Detectors: Principles, Usage, Common Faults, and Repair Methods — Flame Detectors

I. Overview

Smoke and fire detectors are crucial safety devices widely used in residences, offices, factories, warehouses, and various other settings. They promptly detect smoke and flames from fires and sound alarms upon detecting danger, thus protecting people’s lives and property. By sensing specific physical quantities in smoke and flames (such as infrared radiation, ultraviolet radiation, smoke particles, etc.), these detectors trigger alarms and are an indispensable part of modern fire protection systems.

II. Principles

The working principles of smoke and fire detectors are based on multiple sensor technologies, primarily including photoelectric, ionization, and thermosensitive types.

  • Photoelectric Sensor: Utilizes the scattering or interruption of a light beam to detect the presence of smoke. When smoke enters the detection zone, it scatters or blocks the light beam, causing the light signal received by the photosensitive element to weaken or disappear, thereby triggering an alarm.
  • Ionization Sensor: Judges the presence of flames by detecting changes in ion concentration in the air. Normally, the air in the ionization chamber inside the sensor maintains a certain ion concentration balance. When a flame occurs, it alters the ion concentration in the ionization chamber, triggering an alarm.
  • Thermosensitive Sensor: Detects flames based on temperature changes. When a flame occurs, the surrounding temperature rapidly rises, and the thermosensitive element senses the temperature change, converts the signal into an electrical signal, and triggers an alarm.

Additionally, flame detectors detect flames by detecting specific wavelengths of ultraviolet, infrared, and visible light emitted by flames, combined with recognizing the flickering frequency characteristics of flames, enhancing detection accuracy and reliability.

III. Usage

  • Installation: Choose an appropriate installation location and height based on the characteristics and needs of the usage site. Ensure that the detector is at a suitable distance from areas where smoke or flames may occur and avoid installing it in locations easily obstructed or contaminated.
  • Commissioning: After installation, conduct commissioning and testing to ensure the detector operates normally. Check the detector’s power supply, wire connections, and sensor sensitivity and reliability.
  • Usage: During daily use, regularly inspect the detector’s appearance and functionality. Ensure the detector has sufficient power and no obstructions affect its detection effectiveness.

IV. Faults and Repair Methods

Smoke and fire detectors may encounter various faults during usage, commonly including false alarms, no alarms, and delayed alarms. For different faults, the following repair methods can be adopted:

  • False Alarms:
    • Check if the detector is subject to environmental interferences (such as dust, steam, moisture, etc.) and regularly clean the detector’s surface and internal components.
    • Check if the detector’s installation position and angle are correct to avoid false alarms.
    • If the detector is severely aged, consider replacing it with a new one.
  • No Alarms:
    • Check if the detector’s power supply and wiring are normal and ensure stable power supply.
    • Check if the detector’s sensor is damaged or ineffective, and replace the sensor if necessary.
    • If the controller malfunctions, it may be necessary to replace the entire controller or detector.
  • Delayed Alarms:
    • Check if the detector’s sensing threshold setting is reasonable and adjust it if necessary.
    • Clean the detector’s surface and internal components to ensure detection sensitivity.
    • Check if the detector’s communication lines and control center are normal to ensure accurate data transmission.

Regular comprehensive maintenance and repairs of detectors are also crucial measures to ensure their normal operation. This includes cleaning the detector’s surface and internal components, checking power supply and wire connections, and testing detector functionality.

V. Summary

As an essential component of modern fire protection systems, the accuracy and reliability of smoke and fire detectors are directly related to people’s lives and property safety. By understanding their working principles and usage methods, and mastering common faults and repair methods, we can ensure that detectors play their due role in critical moments. Simultaneously, regular maintenance and repairs are key to ensuring the long-term stable operation of detectors.

VI. Flame Detectors Repaired by Longi Electromechanical Company

  1. Honeywell
    • FS24X: Multi-Spectrum Flame Detector
    • FS20X: Multi-Spectrum Flame Detector
    • C7050: UV Flame Detector
    • C7052: IR Flame Detector
  2. Siemens
    • CC62P: Flame Detector
    • CC62: Flame Detector
  3. Spectrex
    • SharpEye Series: SharpEye 40/40I Triple IR (IR3) Flame Detector, SharpEye 40/40R Single IR Flame Detector, SharpEye 40/40L-LB UV/IR Flame Detector, SharpEye 40/40U-UB UV Flame Detector
  4. Dräger
    • Flame 2000 Series: Flame 2100 (UV), Flame 2300 (IR), Flame 2500 (UV/IR), Flame 2700 (Multi IR)
  5. Kidde
    • Kidde Sentinel Series: Sentinel F5000 IR Flame Detector, Sentinel F3000 UV/IR Flame Detector, Sentinel F2000 UV Flame Detector
  6. Det-Tronics
    • X3301: Multi-Spectrum IR Flame Detector
    • X5200: UV Flame Detector
    • X9800: UV/IR Flame Detector
    • X2200: UV Flame Detector
  7. MSA Safety
    • FL4000H: Multi-Spectrum IR Flame Detector
    • FL3100H: UV/IR Flame Detector
    • FL3110: UV Flame Detector
  8. Emerson
    • Rosemount 975 Series: Rosemount 975UR (UV/IR), Rosemount 975IR (IR), Rosemount 975MR (Multi IR), Rosemount 975UV (UV)
  9. Fike
    • FL3100H: UV/IR Flame Detector
    • FL3110: UV Flame Detector
    • FL3111: Single IR Flame Detector
  10. General Monitors
    • FL4000H: Multi-Spectrum IR Flame Detector
    • FL3100H: UV/IR Flame Detector
    • FL3110: UV Flame Detector
  11. Simtronics
    • MultiFlame Series: MultiFlame DF-TV7-T (Triple IR), MultiFlame DF-TV7-V (UV), MultiFlame DF-TV7-VIR (UV/IR)
  12. Oldham (Teledyne)
    • OLCT 100 Series: OLCT 100 IR, OLCT 100 UV/IR, OLCT 100 UV
  13. Micropack
    • FDS301: Visual Flame Detector
    • FDS300: Triple IR Flame Detector
  14. Tyco
    • FLAMEVision Series: FLAMEVision FV300
  15. UTC (United Technologies)
    • FS20X: Multi-Spectrum Flame Detector
    • FS24X: Multi-Spectrum Flame Detector

Longi Electromechanical Company has long been engaged in repairing smoke and fire detectors, with nearly 30 years of experience. We can quickly repair various instruments and also recycle and sell various smoke and fire detectors. Welcome to consult us.