Posted on Leave a comment

User Guide for WTW Trescon OA110 NH4-N Ammonia Nitrogen Analysis Module Manual

I. Module Debugging and Connection

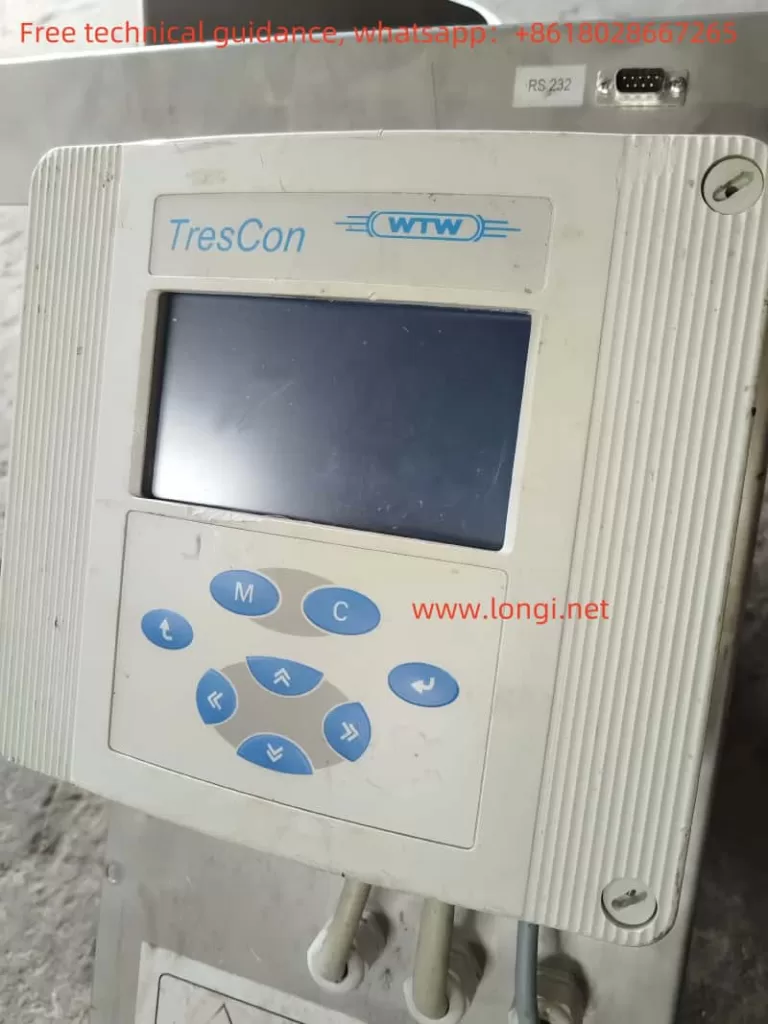
The debugging and connection of the WTW Trescon OA110 NH4-N Ammonia Nitrogen Analysis Module are fundamental to ensure its normal operation. The debugging process includes checking the product delivery list, expanding the analysis module if necessary, connecting the module to the host, and performing initial debugging.

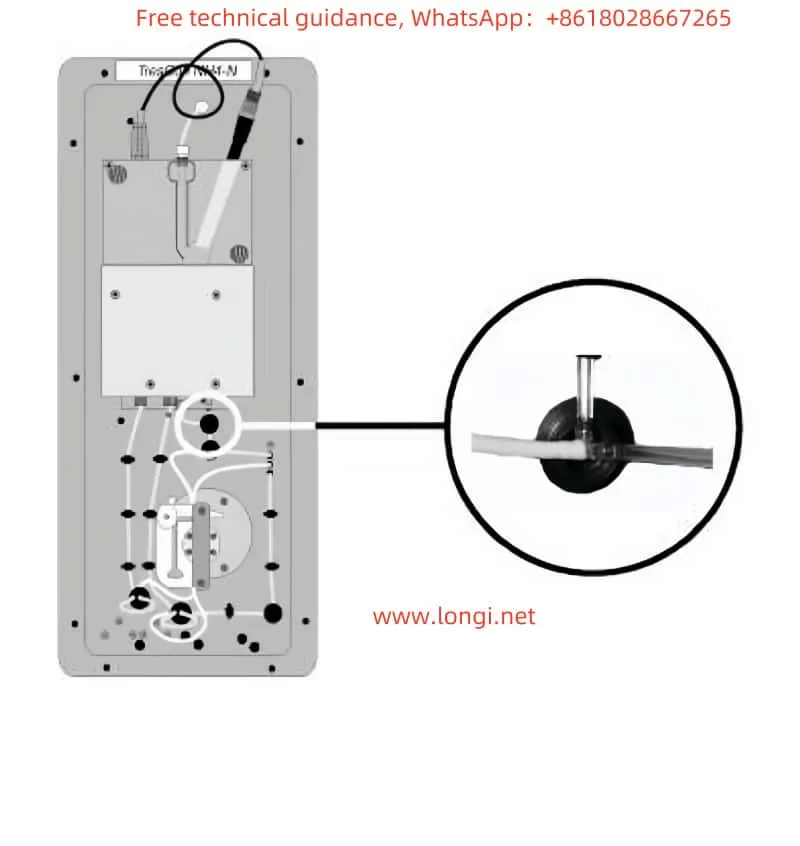
First, users need to verify the product delivery list to ensure that all accessories such as the analysis module, electrodes, tubing, overflow tank, etc., are complete. Next, depending on requirements, users may decide to expand the analysis module. During expansion, it is necessary to install the permeate fluid sampling device and prepare the corresponding reagents. When connecting the analysis module, users need to insert the module’s plug into the corresponding power socket, connect the discharge conduit and ventilation pipe, and install the electrode. Before electrode installation, preprocessing is required, including cleaning the electrode, adding electrolyte, and other steps.

During the initial debugging phase, users need to turn on the power supply, wait for the module to preheat, select the test mode, and perform initial settings such as filling the tubing through the Service menu.

II. Parameter Settings

Parameter settings are crucial for the precise operation of the analysis module. Users can activate various parameter options through the main menu for viewing or modification. Key parameters include calibration data, maintenance, AutoCal (automatic calibration), AutoClean (automatic cleaning), display format, attenuation, interval program, AutoAdapt (automatic adaptation), test interval, and dilution factor. When setting parameters, users need to enter a PIN code to confirm changes, and changes to some important parameters will cause the module to enter stop mode.

III. Module Operation

Module operation includes testing, calibration, displaying calibration data, viewing/changing parameters, etc. Testing can be conducted in continuous or intermittent modes, which can be selected in the interval program menu. The calibration process is automatically completed by the AutoCal system, and users can manually initiate it or set the automatic calibration interval. When displaying calibration data, the module will show the detailed parameters of the last calibration. Users can also view or change various parameter settings through the corresponding menus.

IV. Maintenance

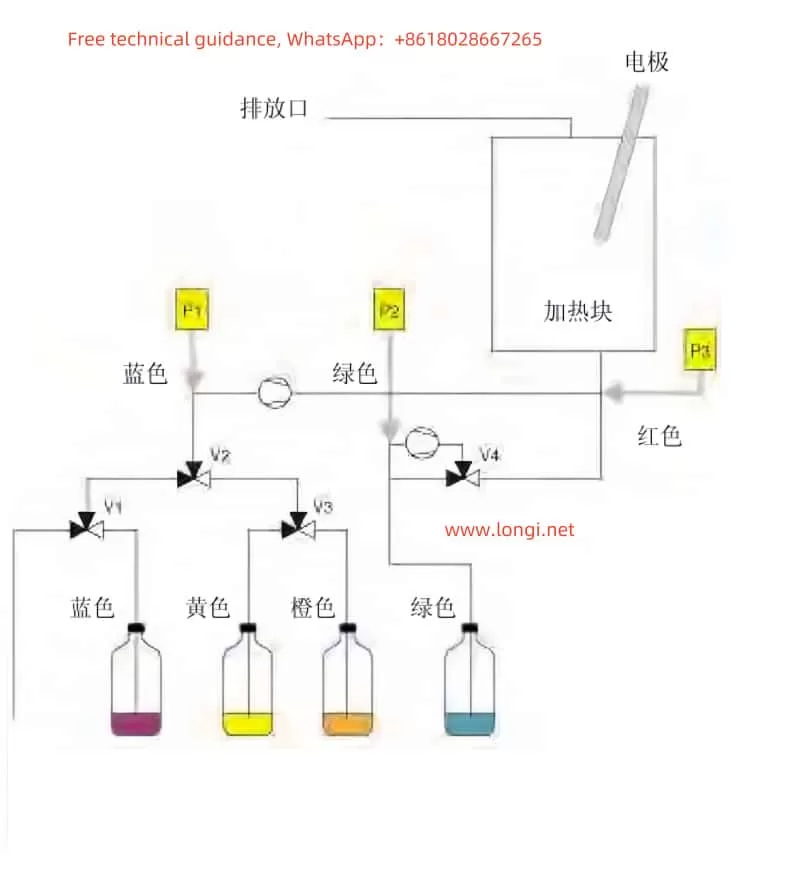
Regular maintenance is crucial to ensure the long-term stable operation of the analysis module. Maintenance includes initiating the AutoClean program, filling tubing, replenishing cleaning solution, replacing silicone tubing, replacing membranes/electrodes, etc. The AutoClean program can automatically clean the system, and users can also manually initiate it. When filling tubing, specific reagents and cleaning solutions need to be used following the step-by-step operation. When replenishing cleaning solution, standard solutions, and reagents, users need to ensure that the containers are connected and filled with the corresponding liquids.

When replacing silicone tubing, users need to first empty the system, then replace or move the silicone tubing, and refill the tubing. When replacing membranes/electrodes, users need to first disconnect the electrode, replace the new membrane or electrode, reconnect it, and recalibrate. In addition, users also need to regularly inspect and replace wear parts such as T-pieces.

V. Error Messages and Troubleshooting

During operation, the analysis module may encounter various error messages, such as reagent blockage, reagent depletion, calibration failure, etc. The module will display error messages on the screen and automatically enter stop mode. Users need to take corresponding measures based on the error message prompts, such as checking if the tubing is twisted, replacing reagent bottles, recalibrating, etc. If the error message cannot be resolved, users can contact the WTW customer service department for assistance.

For example, when the screen displays “Reagent Blockage,” users need to first check if the tubing is twisted or pressed by other objects. If the problem persists, the connecting tubing needs to be replaced. If “Calibration Failure” is displayed, users need to check the electrode status and replace the electrode or membrane if necessary, then recalibrate.

In summary, the WTW Trescon OA110 NH4-N Ammonia Nitrogen Analysis Module manual provides users with detailed guides for debugging, connection, parameter setting, operation, maintenance, and error handling. Users need to carefully read and follow the instructions in the manual to ensure the normal operation of the analysis module and the accuracy of test results.

Posted on Leave a comment

WTW TresCon UNO Nitrogen and Phosphorus Analyzer User Manual Operation Guide

I. Analyzer Structure, Function, and Safe Operation

The WTW TresCon UNO Nitrogen and Phosphorus Analyzer is a high-performance single-module analyzer widely used in sewage treatment plants and environmental monitoring. The analyzer features a compact structure and powerful functions, consisting primarily of a controller, analytical modules, reagent trays, overflow tanks, and mounting brackets.

Brief Introduction to Analyzer Structure:

  • Controller: Serves as the control and operation unit of the instrument, equipped with a flat display and touch buttons for dialogue-based menu operation.
  • Analytical Modules: Can be installed with modules for testing ammonia nitrogen (NH4-N), nitrite nitrogen (NO2-N), nitrate nitrogen (NOx-N), and phosphate (PO4-P), meeting various testing needs.
  • Reagent Tray: Used for storing reagents required by the analytical modules, ensuring convenient reagent management and replacement.
  • Overflow Tank: Ensures sufficient but not excessive sample volume, with an optional control valve for automatic cleaning.

Safe Operation Procedures:
Before using the TresCon UNO analyzer, it is crucial to carefully read the safety regulations and understand the boundaries between permitted and prohibited operations. During operation, wear appropriate personal protective equipment such as safety goggles, gloves, and protective clothing. Immediately stop using the instrument and contact professional maintenance personnel in case of faults or abnormalities.

II. Initial Commissioning Process

Initial commissioning is a crucial step to ensure the normal operation of the analyzer. Before commissioning, check if the wastewater connection conduit, tray discharge outlet, sample inlet pipeline, and electrical connections comply with specifications. During commissioning, turn on the power supply, wait for the analytical module to heat up to the set temperature, and then enter the measurement mode. Adjust system parameters such as ID number, PIN code, date, and time according to actual needs.

III. Detailed Operation Procedures

Basic Operating Principles:
The TresCon UNO analyzer is operated through the control buttons and display on the controller. The display shows measurement values, menu options, and related parameters, while the control buttons are used for menu switching, input confirmation, measurement initiation, etc.

Test Value Settings:
Users can set daily, weekly, and monthly reports to view measurement data within specific time periods. Additionally, composite sample averages can be calculated, and data storage and print intervals can be set.

Controller Settings:
In controller settings, users can customize the display format of measurement values and screen information, set recorder output parameters, name analytical modules, and change screen language. For example, users can set relays as frequency controllers, pulse-width controllers, or high/low-point controllers to achieve different monitoring and control functions.

Overflow Valve Control:
For overflow tanks equipped with controllable discharge valves, users can set the valve opening time and interval on the controller to achieve automatic cleaning.

IV. Detailed Maintenance Procedures

Recorder Testing:
Users can set the default output values for the recorder and check its operating status. In the maintenance mode, users can test the output current of each recorder individually to ensure it is within the normal range.

Relay and Valve Testing:
In maintenance mode, users can individually turn on or off relays and valves to check their responses. Simultaneously, the interface test function can be used to send test strings to the specified interface to verify its normal communication.

Interface Testing:
The TresCon UNO analyzer provides RS232 and RS485 interfaces for remote monitoring and data transmission. During maintenance, it is necessary to test the connection stability and data transmission accuracy of these interfaces.

Button and Display Testing:
Button testing is used to check the response of each button, ensuring no失效buttons. Display testing involves displaying different colors row by row to check the integrity and color accuracy of the display screen.

Furthermore, users need to regularly clean and maintain the analyzer, checking the cleanliness and integrity of components such as reagent trays, overflow tanks, and mounting brackets. When necessary, contact WTW-authorized service engineers for professional maintenance and servicing.

In summary, the WTW TresCon UNO Nitrogen and Phosphorus Analyzer User Manual provides detailed operation guides and maintenance procedures. By following the guidance in the manual, users can ensure the normal operation and accurate measurement of the analyzer, providing strong support for environmental monitoring and water quality management.