Posted on Leave a comment

Global Variable Frequency Drive (VFD) repair center

“Longi Electromechanical” has more than 20 years of experience in industrial control maintenance, and is one of the earliest companies engaged in VFD repair. Equipped with artificial intelligence AI maintenance instruments, it specializes in emergency repair of various equipment, with high technical efficiency. It has repaired more than 200,000 units of equipment, including ultrasonic, robot, charging pile, inverter,Variable Frequency Drive (VFD), touch screen, servo, intelligent instrument, industrial control machine, PLC and other products. General problems can be repaired on the same day. LONGI promises you that “if it can’t be repaired, we won’t charge you”. And it provides lifelong maintenance service and free technical consultation for inspection! For urgent repair consultation, please call the contact number or add WHATSAPP maintenance hotline: +8618028667265 Mr. Guo

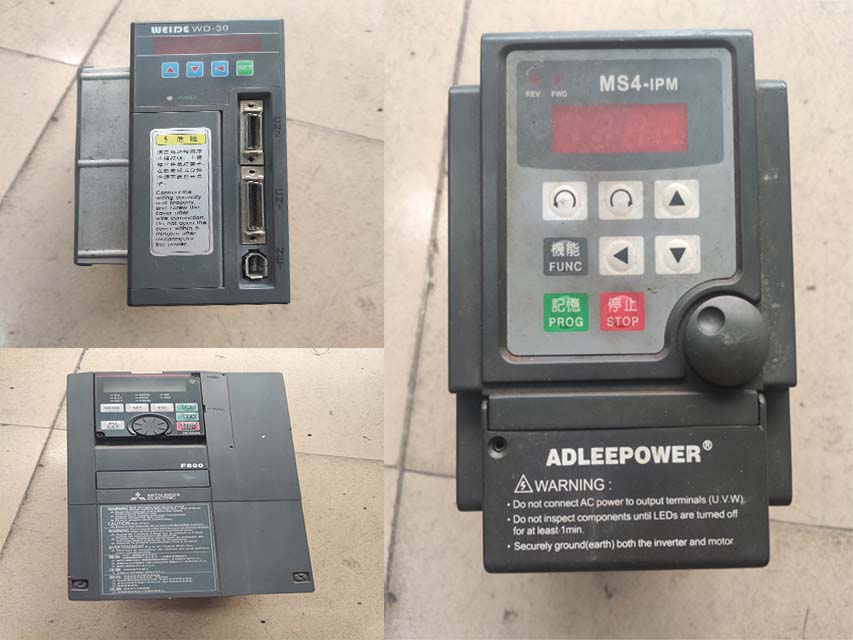
From European and American brands to Japanese, Korean, and Taiwanese ones, until various domestic brands, we have repaired countless models and specifications of VFDs. In the process of serving our customers, we have continuously learned and accumulated maintenance experience to enhance our skills. We specialize not only in repairing VFDs but also in summarizing various maintenance experiences, elevating them to a theoretical level. We have published the book “VFD Maintenance Technology” and offered VFD maintenance training, thereby promoting the development of the VFD maintenance industry. Longi Electromechanical Company has repaired VFDs from the following brands:

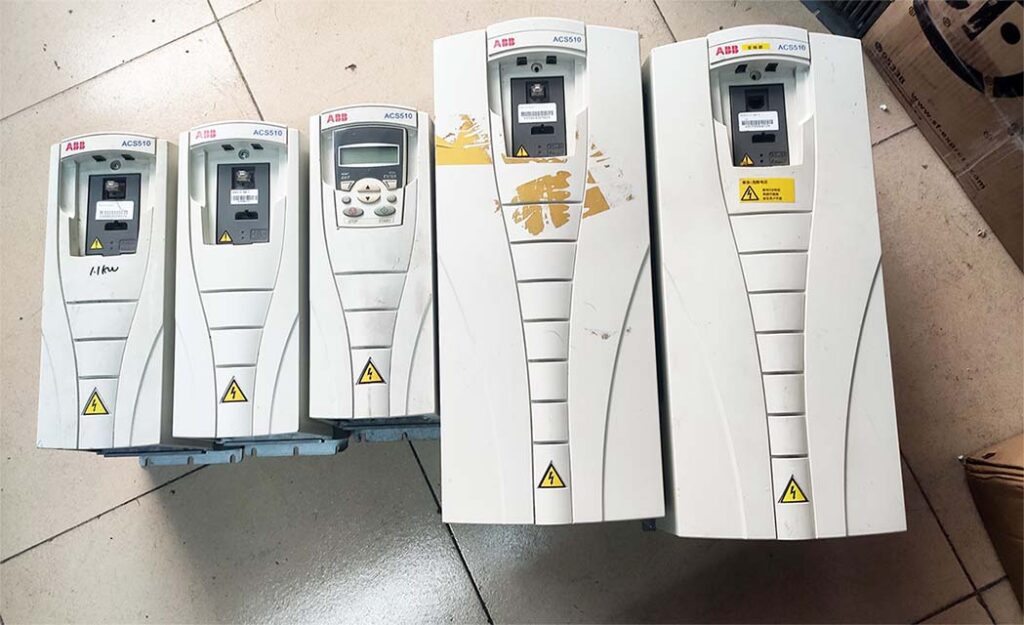
European and American Brands

ABB drives, SEW drives, LUST VFD, LENZE VSD, Schneider drives, CT drives, KEB VSD, Siemens drives, Eurotherm VFD, G.E. VFD, VACON VSD, Danfoss VFD, SIEI VFD, AB VFD, Emerson VFD, ROBICON VFD, Ansaldo VFD, Bosch Rexroth VSD, etc.

Japanese Brands:

Fuji INVERTER, Mitsubishi INVERTER, Yaskawa INVERTER, Omron INVERTER, Panasonic INVERTER, Toshiba INVERTER, Sumner INVERTER, Tooka INVERTER, Higashikawa INVERTER, Sanken INVERTER, Kasia INVERTER, Toyo INVERTER, Hitachi INVERTER, Meidensha INVERTER, etc.

Taiwanese Brands:

Oulin INVERTER, Delta INVERTER, Taian INVERTER, Teco INVERTER, Powtran INVERTER, Dongling INVERTER, Lijia INVERTER, Ningmao INVERTER, Sanji INVERTER, Hongquan INVERTER, Dongli INVERTER, Kaichi INVERTER, Shenghua INVERTER, Adlee INVERTER, Shihlin INVERTER, Teco INVERTER, Sanchuan INVERTER, Dongweiting INVERTER, Fuhua INVERTER, Taian INVERTER (note: Taian is repeated, possibly a mistake in the original list), Longxing INVERTER, Jiudesongyi INVERTER, Tend INVERTER, Chuangjie INVERTER, etc.

Chinese Mainland brands:

Senlan Inverter, Jialing Inverter, Yineng Inverter, Hailipu Inverter, Haili Inverter, Lebang Inverter, Xinnuo Inverter, Kemron Inverter, Alpha Inverter, Rifeng Inverter, Shidai Inverter, Bost Inverter, Gaobang Inverter, Kaituo Inverter, Sinus Inverter, Sepaxin Inverter, Huifeng Inverter, Saipu Inverter, Weier Inverter, Huawei Inverter, Ansheng Inverter, Anbangxin Inverter, Jiaxin Inverter, Ripu Inverter, Chint Inverter, Delixi Inverter, Sifang Inverter, Geli Te Inverter, Kangwo Inverter, Jina Inverter, Richuan Inverter, Weikeda Inverter, Oura Inverter, Sanjing Inverter, Jintian Inverter, Xilin Inverter, Delixi Inverter, Yingweiteng Inverter, Chunri Inverter, Xinjie, Kemron-Bong Inverter, Nihonye Inverter, Edison Inverter

Other brands:
Migao VFD, Rongqi VFD, Kaiqi VFD, Shiyunjie VFD, Huichuan VFD, Yuzhang VFD, Tianchong VFD, Rongshang Tongda VFD, LG VFD, Hyundai VFD, Daewoo VFD, Samsung VFD, etc.

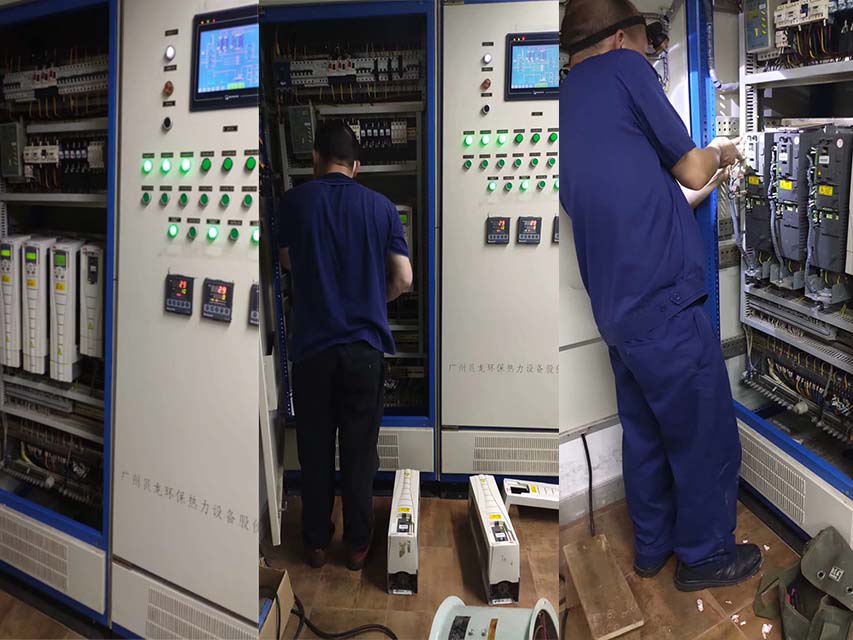
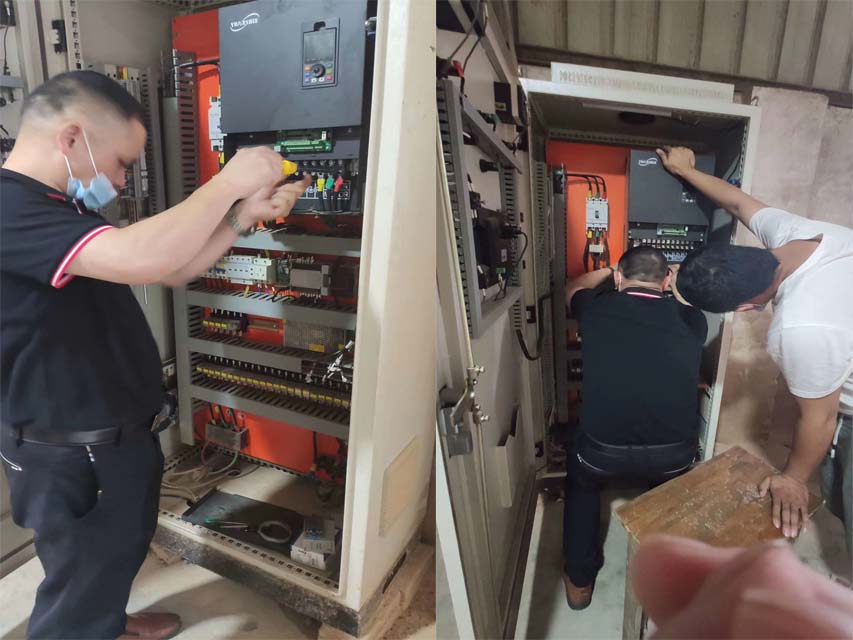
Longi Electromechanical Company specializes in the maintenance of VFDs and strictly requires its engineers to followlow standard operating procedures. Upon receiving a unit, the engineers carefully inspect its exterior and clarify any fault conditions with the customer before beginning work. Any removed circuit boards are cleaned using ultrasonic cleaning equipment. Repaired circuit boards are coated with high-temperature and high-pressure-resistant insulating paint, dried in a drying machine, and then reinstalled in the VFD, with measures taken to prevent corrosion and interference.

The repaired VFD will undergo a simulated operation with load using a heavy-load test bench to avoid any potential issues that may arise under actual load conditions on site.

When it comes to VFD maintenance, most cases are related to the equipment on site. Sometimes a standalone unit may have been repaired, but it doesn’t work properly when installed on site. In some cases, the problem lies with the system rather than the VFD itself. For such issues, if the customer requests on-site service, we will do our utmost to resolve the problem for them. If the location is far away, such as in another province, we can use tools like video conferencing and phone calls to allow our engineers to remotely diagnose and resolve the on-site issues for the customer.

Posted on Leave a comment

What should be done if the CONVO VSD is not connected to the motor and the frequency of the motor cannot be adjusted?

A 5.5kW Konwo frequency converter sent for repair, the customer said: there is output, but it cannot operate with load, the motor cannot rotate, and the operating frequency cannot be adjusted. Check the main circuit, rectifier and inverter circuits, all of which are normal. Power on, measure the three-phase output voltage without load and it is normal. Connect a 1.1kW no-load motor and start the frequency converter to run. The frequency cannot rise near one or two hertz, and the motor has a pause and produces a creaking sound. No overload or OC fault is reported. Stop and restart, still the same.
Disconnect the 550V DC power supply of the inverter module and send another 24V DC low-voltage power supply to check the driving circuit. Check the capacitors and other components of the driving circuit and driving power supply circuit, and they are all normal. The positive and negative pulse currents output by the three arm drive circuit on the inverter output have reached a certain amplitude, and there should be no problem driving the IGBT module; But when measuring the positive and negative pulse currents output by the three arm drive circuit, a module fault is reported. Analyze the reason, as the DC current range of the multimeter is directly short circuited to measure the triggering terminal, the internal resistance of the DC current range of the multimeter is small, which greatly lowers the positive excitation voltage output by the driving circuit, such as below 10V. This voltage cannot trigger the IGBT tube normally and reliably. Therefore, the module fault detection circuit detects the voltage drop of the IGBT tube and reports a fault in the OC module. The fault was actually caused by the measurement method. When the probe was connected in series with a resistance of more than ten ohms and the output current of the drive circuit was measured, the OC fault was not reported. Check the signal output circuit of the current transformer again, and it is also normal. During operation, no fault signal is reported.

I feel like there’s nowhere else to go and I can’t find the cause of the malfunction. Is the problem with the driver, module, current detection, or other circuits? The fault was not detected throughout the afternoon. For a moment, I felt a bit indifferent and worried.

  1. Does the CPU detect abnormal current during startup and take measures to slow down?
  2. Is the current limiting action made by the driving circuit due to abnormal driving or poor module performance?
    Under low-frequency operation, try to short-circuit the shunt resistors of the U, V, and W output circuits to make the CPU exit the frequency reduction and current limiting action, which is ineffective;
    Restoring the parameters to their factory values (suspecting that this operating mode may have been manually set) is invalid.
    Start the frequency converter and observe carefully: after the speed rises to 3Hz, it drops to 0Hz, and repeat this process. The motor stops running.
    After significantly increasing the acceleration time, it steadily increased to 3Hz and then decreased to 0Hz, indicating that there were no abnormalities in the driving and other circuits. This operating phenomenon should be formed based on the signal emitted by the CPU, which seems to act as a current limiting action based on the current signal.
    The self deceleration during the starting process is generally due to the following two reasons:
  1. During the startup process, the CPU detects a sharp increase in abnormal current values and performs immediate frequency reduction processing. When the current returns to within normal values, it then increases the frequency for operation;
  2. During the startup process, the CPU detects an abnormal drop in the DC voltage of the main circuit and performs immediate frequency reduction processing. When the voltage of the main circuit returns to within normal values, it then increases the frequency for operation;
    After the drive and current detection circuits have no issues, maintenance should be carried out from the perspective of voltage.
    The anomalies caused by voltage can also be divided into two aspects:
  3. Caused by abnormal DC voltage detection circuit in the circuit (drift of reference voltage, variation of sampling resistance, etc.). This signal causes the CPU to mistakenly assume that the voltage is too low, and therefore takes measures to reduce the output frequency to maintain a stable voltage;
  4. The abnormality of the main DC circuit causes a low voltage (loss of capacity of the energy storage capacitor, failure to close the charging short circuit contactor, etc.), which is detected by the detection circuit and causes the CPU to take a frequency reduction action during the startup process.
    Reinstall and power on the machine, and conduct a motor test. When powered on, no sound of the charging contactor closing was heard. Check that the contactor coil is AC 380V, taken from the R and S power supply incoming terminals. Loose coil lead terminals caused poor contact, and the contactor failed to engage. The large current during startup creates a significant voltage drop on the charging resistor. The sharp drop in the DC voltage of the main circuit is detected by the voltage detection circuit, prompting the CPU to issue a frequency reduction command.

The reason for taking many detours is that the machine only performed frequency reduction treatment when the voltage dropped, and did not report an undervoltage fault. In this case, other models often have reported undervoltage faults. Also due to the reason of no load, during frequency reduction processing, the voltage quickly rises and the frequency continues to rise. Then the voltage drops again, and the frequency converter reduces the frequency processing, allowing the voltage to rise again. This repeated process causes the frequency converter to increase speed, decrease to zero speed, pause and then increase speed again, and then decrease to zero speed. But it does not shut down and does not report any fault signals.
It’s a bit funny that such a simple fault should be thoroughly investigated on its normal circuit. Due to its failure to report fault codes, the inspection steps were somewhat bewildered.
This article is shared with everyone – when the charging contactor of the Kangwo inverter is in poor contact, it may be adjusted in a frequency reduction manner during the starting process in a light load state, without reporting an undervoltage fault signal and implementing shutdown protection. In the loaded starting state, the DC circuit should have a significant drop and should be able to report an undervoltage fault.
The frequency converter is an organic combination of software and hardware circuits, and the above fault phenomena are formed under the automatic control of software programs. If we only rely on the fixed thinking pattern formed by surface phenomena and past experience, without in-depth analysis and detailed observation, we would really treat this simple fault as a difficult one to repair.

Posted on Leave a comment

Troubleshooting of CVF-G1 type switching power supply for CONVO frequency converter

Received 3 small power machines from Kangwo CVF-G1, all of which had faults due to no output from the switching power supply and no screen display. The IC of the power supply for this machine is 3844B, and I do not have this model of IC at hand. It is impossible that all three machines are damaged by 3844B, right? So start by checking its peripheral circuits.

All switch mode power supplies have the following branches: 1. The power on start branch is often composed of several resistors with larger resistance values connected in series. When powered on, 500V DC is led to the 3844B power supply pin to provide the starting voltage of the switch tube; 2. The positive feedback and working power supply branches are composed of feedback windings and rectifier filtering circuits (some machines are composed of two winding power supply branches, while others are used in combination); 3. The stabilizing branch is usually powered by a secondary 5V power supply branch, which compares the change in 5V voltage with a reference voltage. Its variable is fed back to the 2 pins of the primary 3844B through the optocoupler, but the voltage feedback of this model is taken from the primary.
The conditions for the circuit to vibrate are: 1. The 500V power supply circuit is normal, the 500V DC is added to the drain of the switch through the main winding, and the source of the switch is formed by a small resistance current sampling resistor to form the power supply circuit; 2. The power on startup branch is normal, providing sufficient amplitude of starting voltage (current); 3. Positive feedback and working power supply branches are normal, providing positive feedback voltage (current) and working power supply that meet amplitude requirements; 4. There is no short circuit on the load side, and the short circuit on the load side cannot establish sufficient amplitude of the feedback voltage, so the circuit cannot vibrate. The above circuit can be called an oscillation circuit.
To minimize the fault, the voltage stabilizing branch should be opened to see if the circuit can vibrate. Voltage reduction and regulation power supply should be implemented, and circuits that are susceptible to voltage impact damage should be cut off to ensure safety. If it can vibrate, it indicates that the four branches that meet the vibration conditions are generally normal, and the faulty components of the voltage stabilizing branch can be further investigated. If the vibration still cannot start, it indicates that the fault is in the oscillation circuit. You can search for the four branches mentioned above.
According to the above inspection sequence, the faults in the switching power supply of machines A, B, and C are all in the oscillation circuit. Check that there are no abnormalities in the four branches of machine A and the peripheral components of 3844B. Try replacing a 3845B and the power output is normal. Repair it; Machine B, after switching to 3845B, still cannot vibrate, and all four branch components are normal. After connecting the 300k resistor of the power on starting branch in parallel with the 200k resistor, the power on is restored to normal; Machine C was also damaged for 3844B, and the fault was resolved after replacing it with a new block.
Only the malfunction of machine B is slightly interesting. The analysis is as follows:
On the surface, it appears that the second machine could not detect any faulty parts, leading to difficulties in maintenance. But after reducing the resistance value of the starting branch, it can work normally. Where exactly is the abnormality of machine B? It may be a slight change in the performance of components that leads to changes in electrical parameters, such as a slight decrease in the amplification ability of switching tubes, a change in Q value of switching transformers due to mild moisture, an increase in internal resistance of 3844B output, or a slight variation in resistance capacitance components. Finding and confirming the above reasons is indeed difficult, or there may be one or even multiple reasons involved. But the various reasons mentioned above only lead to one consequence: the switch tube cannot be effectively started, and the circuit cannot vibrate! The solution is to transform the existing state and exert efforts to promote the oscillation of the switching tube. Parallel connection of resistors in the starting branch is the most labor-saving and effective method.
By the way, the starting resistance of the machine is 300k, and with the addition of resistance from other links, the actual starting current applied to the gate of the switching tube is only slightly over 1mA. Although field-effect transistors are voltage controlled devices that theoretically do not absorb current, the charging current of the junction capacitor that can make them conductive is precisely the hard indicator that makes them conductive. From this perspective, field-effect transistors are still current drivers. When the circuit parameters change, the supply current of the original starting branch is not enough to make the switching transistor conductive or even slightly conductive, so the circuit cannot vibrate. By slightly increasing the starting current value, the circuit may start to vibrate. There is a suspicion that the resistance value of the 300k starting resistor is too high. I believe that slightly reducing its resistance value is beneficial and not harmful.

Therefore, an efficient repair method can be taken as follows: check that the switch tube is not damaged, and that the four branches are generally normal. First, conduct a parallel resistance test on the starting branch, and if it fails, switch to 3844B. If it fails again, then focus on carefully checking the circuit. Often, the fault is already resolved in the first or second step.